How to integrate Midjourney API into Zapier



Hi everyone! I'm sure many of you all have heard of Zapier, it is an online automation tool that allows you to streamline your workflows and connect different web applications seamlessly. In Zapier's visually simple workspace, you can drag and drop various built-in tools such as webhooks and tables, as well as connected apps like Gmail and Slack into the workflow.
Today, we will dive in and see how we can connect and integrate PiAPI's Midjourney API into Zapier. Let's go!
Sign up
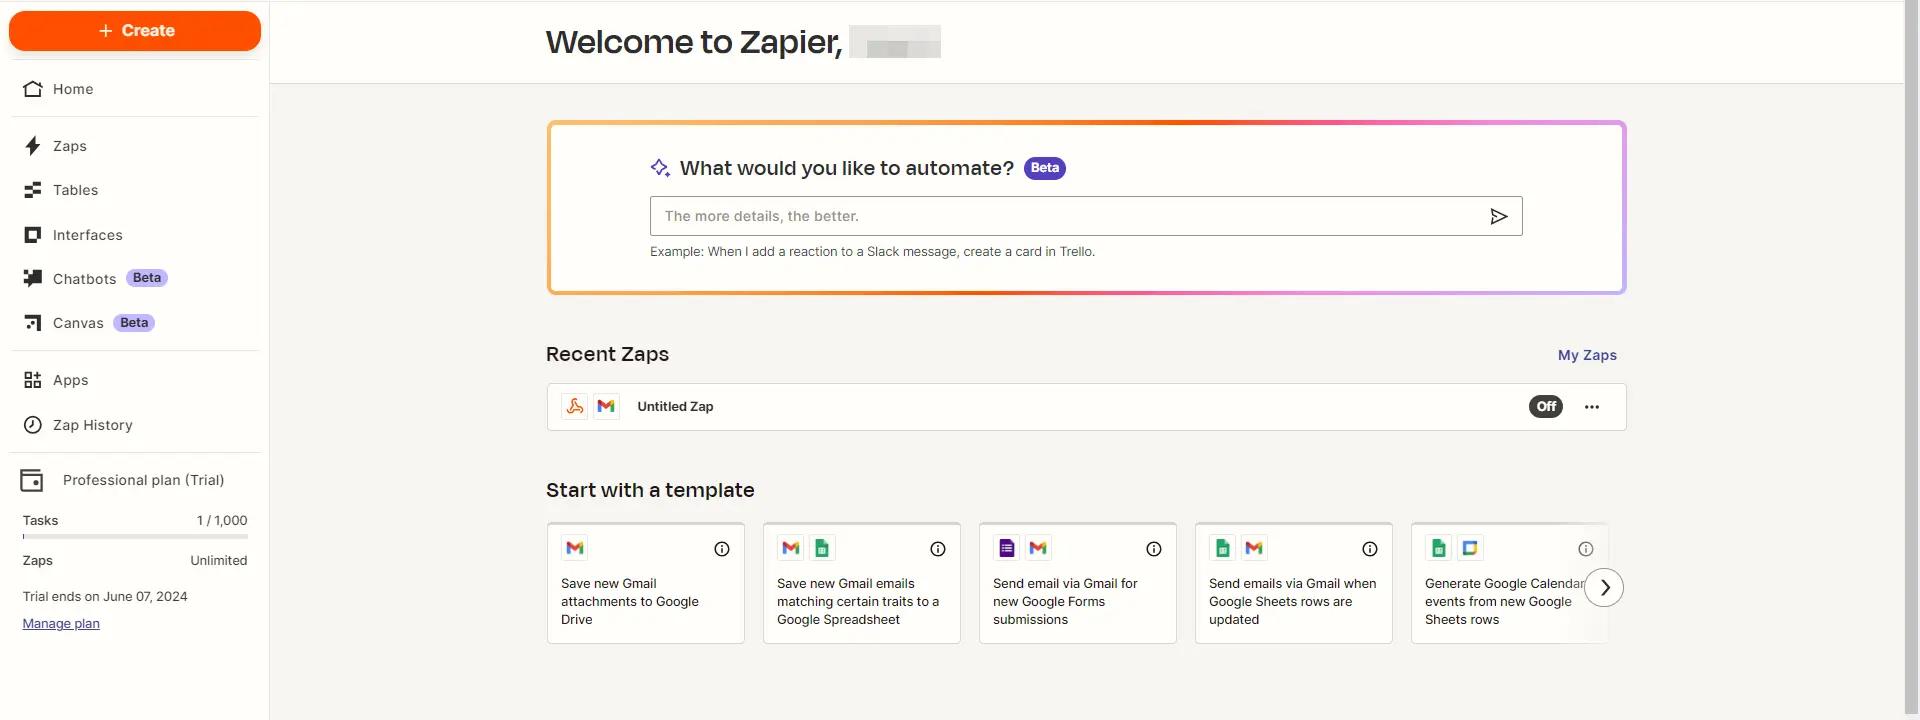
First and foremost, we will need to jump into Zapier's website and sign up for an account or directly log in with your Google account. Once you've signed up and logged in, you may choose the connected apps you want to use and click the 'Finish Setup' button. After that, you will be redirected to the dashboard page, which will look similar to the image below.
Below are some common terms used in Zapier:
Zap: Zap refers to an automated workflow that comprises of a trigger and one or multiple actions executed when the trigger event initiates; zap allows you to automate tasks based on specific events.
Trigger: A trigger is an event that initiates an automation workflow. The trigger event can be set up using either Built-in tools (ex. webhook) or can be set in some connected apps (ex. Gmail, Google Docs, Google Drive, etc.)
Action: An action is an event that an zap is performed after an triggered event. The action event can set up using either Built-in tools (ex. Tables) or can be set in some connected apps.
Creating a zap
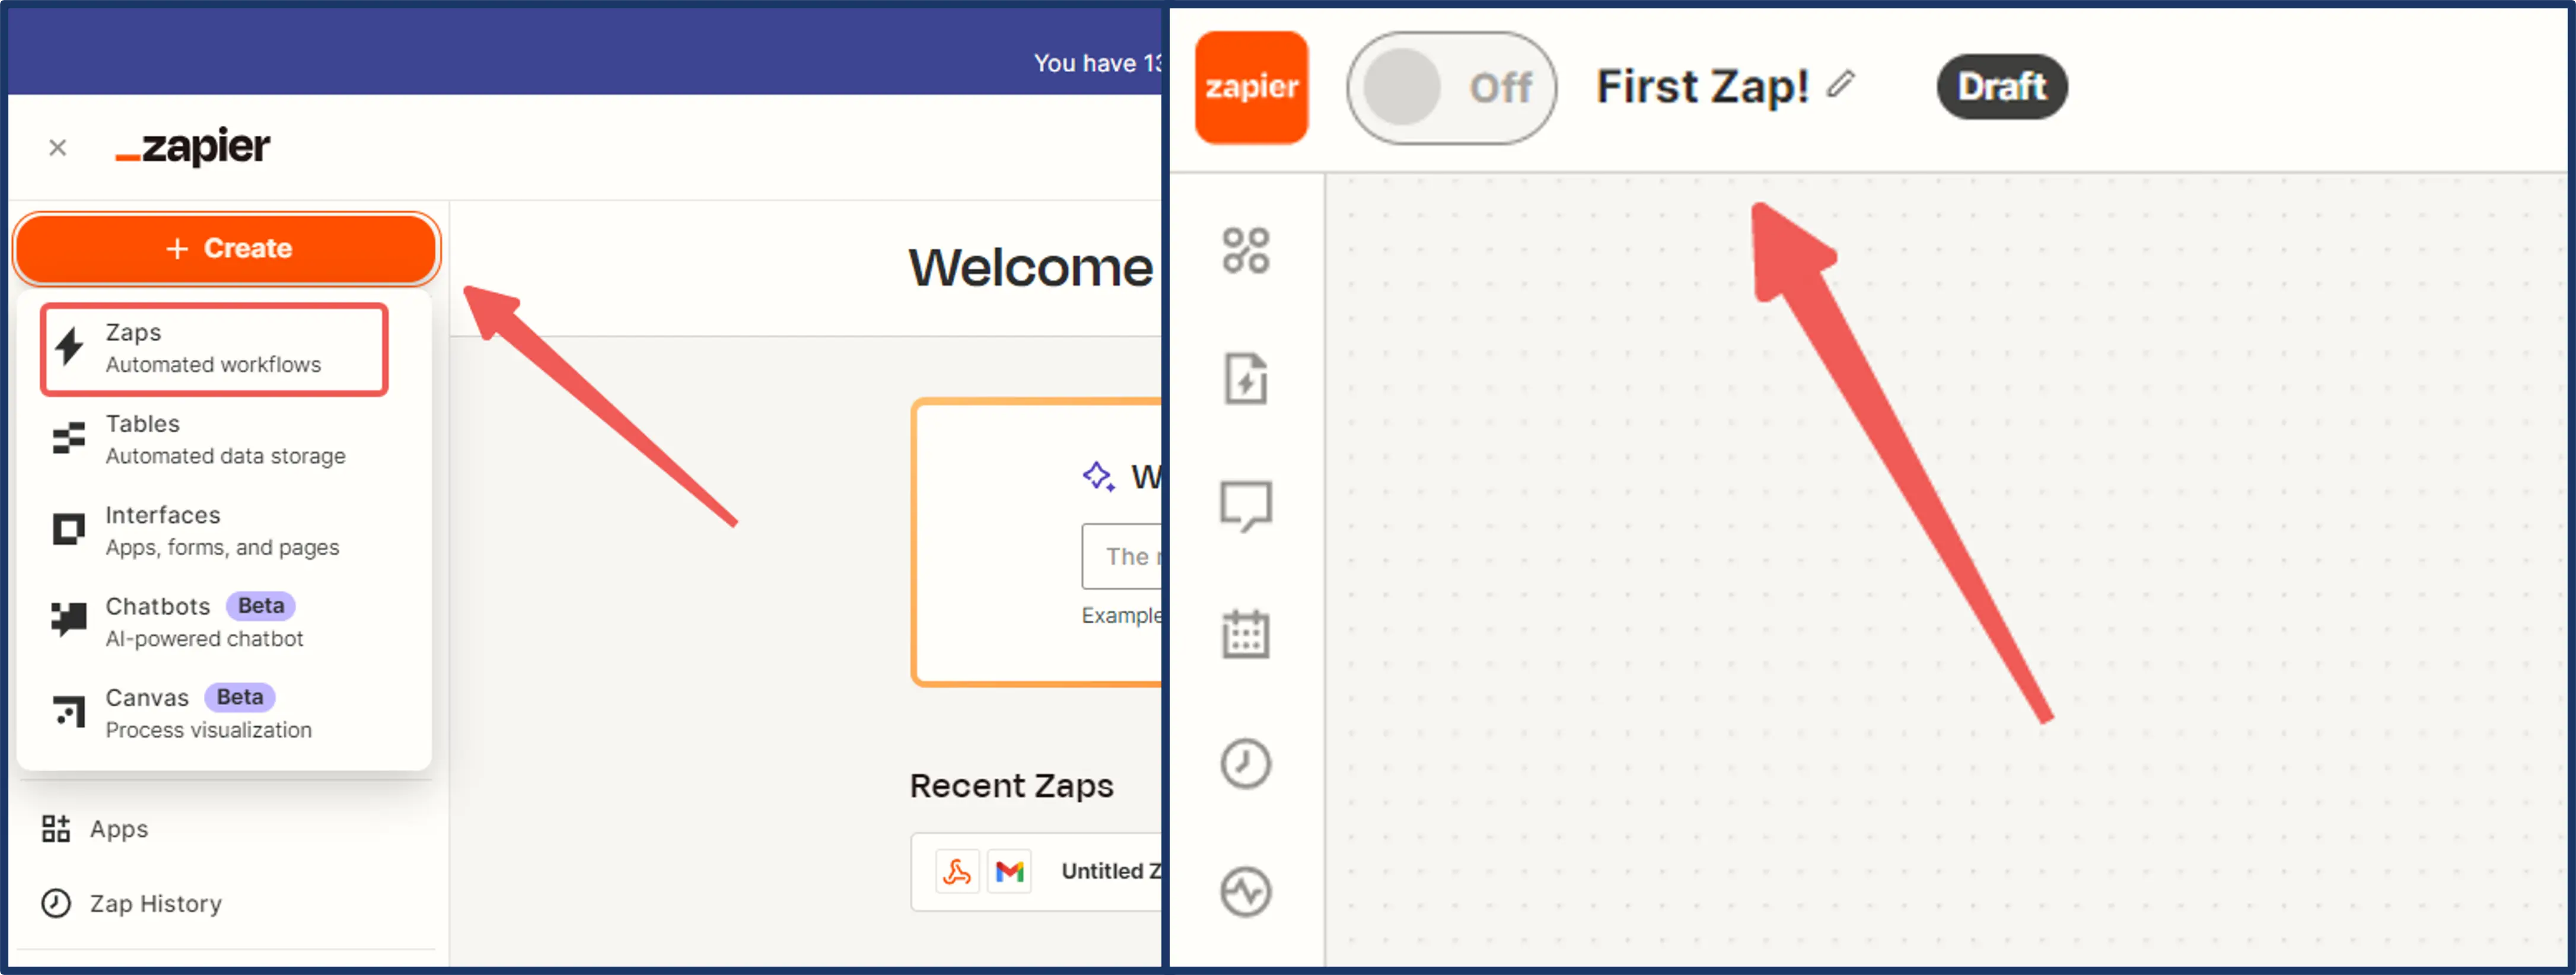
Now, we are going to create a Zap, by clicking the create and then the Zap button on the top-left corner of the dashboard. Once you are inside the editor, you may click the 'Edit' icon on the top-left corner and change the 'Untitled Zap' input into your preferred name.
Set up a Trigger
Next, let's move on to set up the 'Trigger'. There are two main Trigger types:
- Polling Trigger - A trigger that asks the API for all recent data. If there is no new data, it waits for a period of time before asking again.
- Instant Trigger - A trigger that sends new data to Zapier from an application automatically without asking the API if there is any new data.
For today's tutorial, we will be using Instant Triggers. The first step is to click on the Trigger box and click on Webhook.
Note: Zapier's webhook tool is a premium app. When you create a new Zapier account, you will have 14 days of free trial to try Zapier's paid features. These paid features include Premium apps, such as PayPal and webhook (which we will be using for this tutorial). You may refer to this link here: help.zapier.com
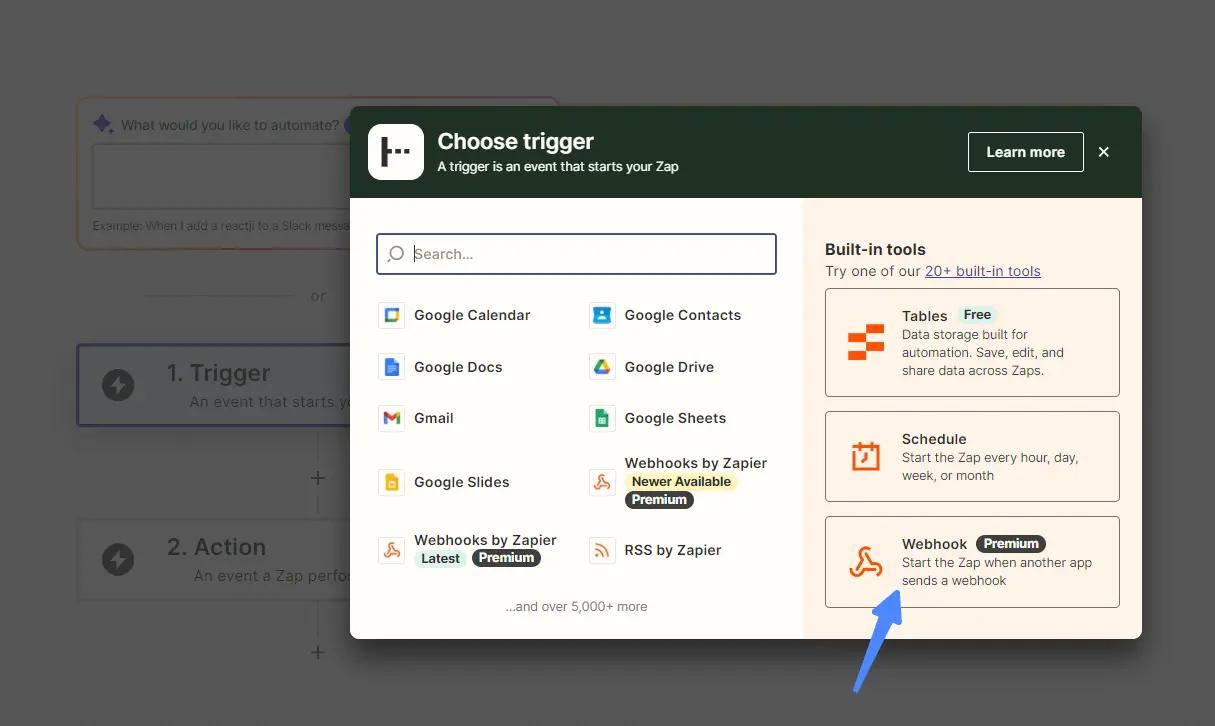
Our next step will be to search for Catch Hook and select it as an event, leave the trigger section empty and click continue.

Testing the Trigger
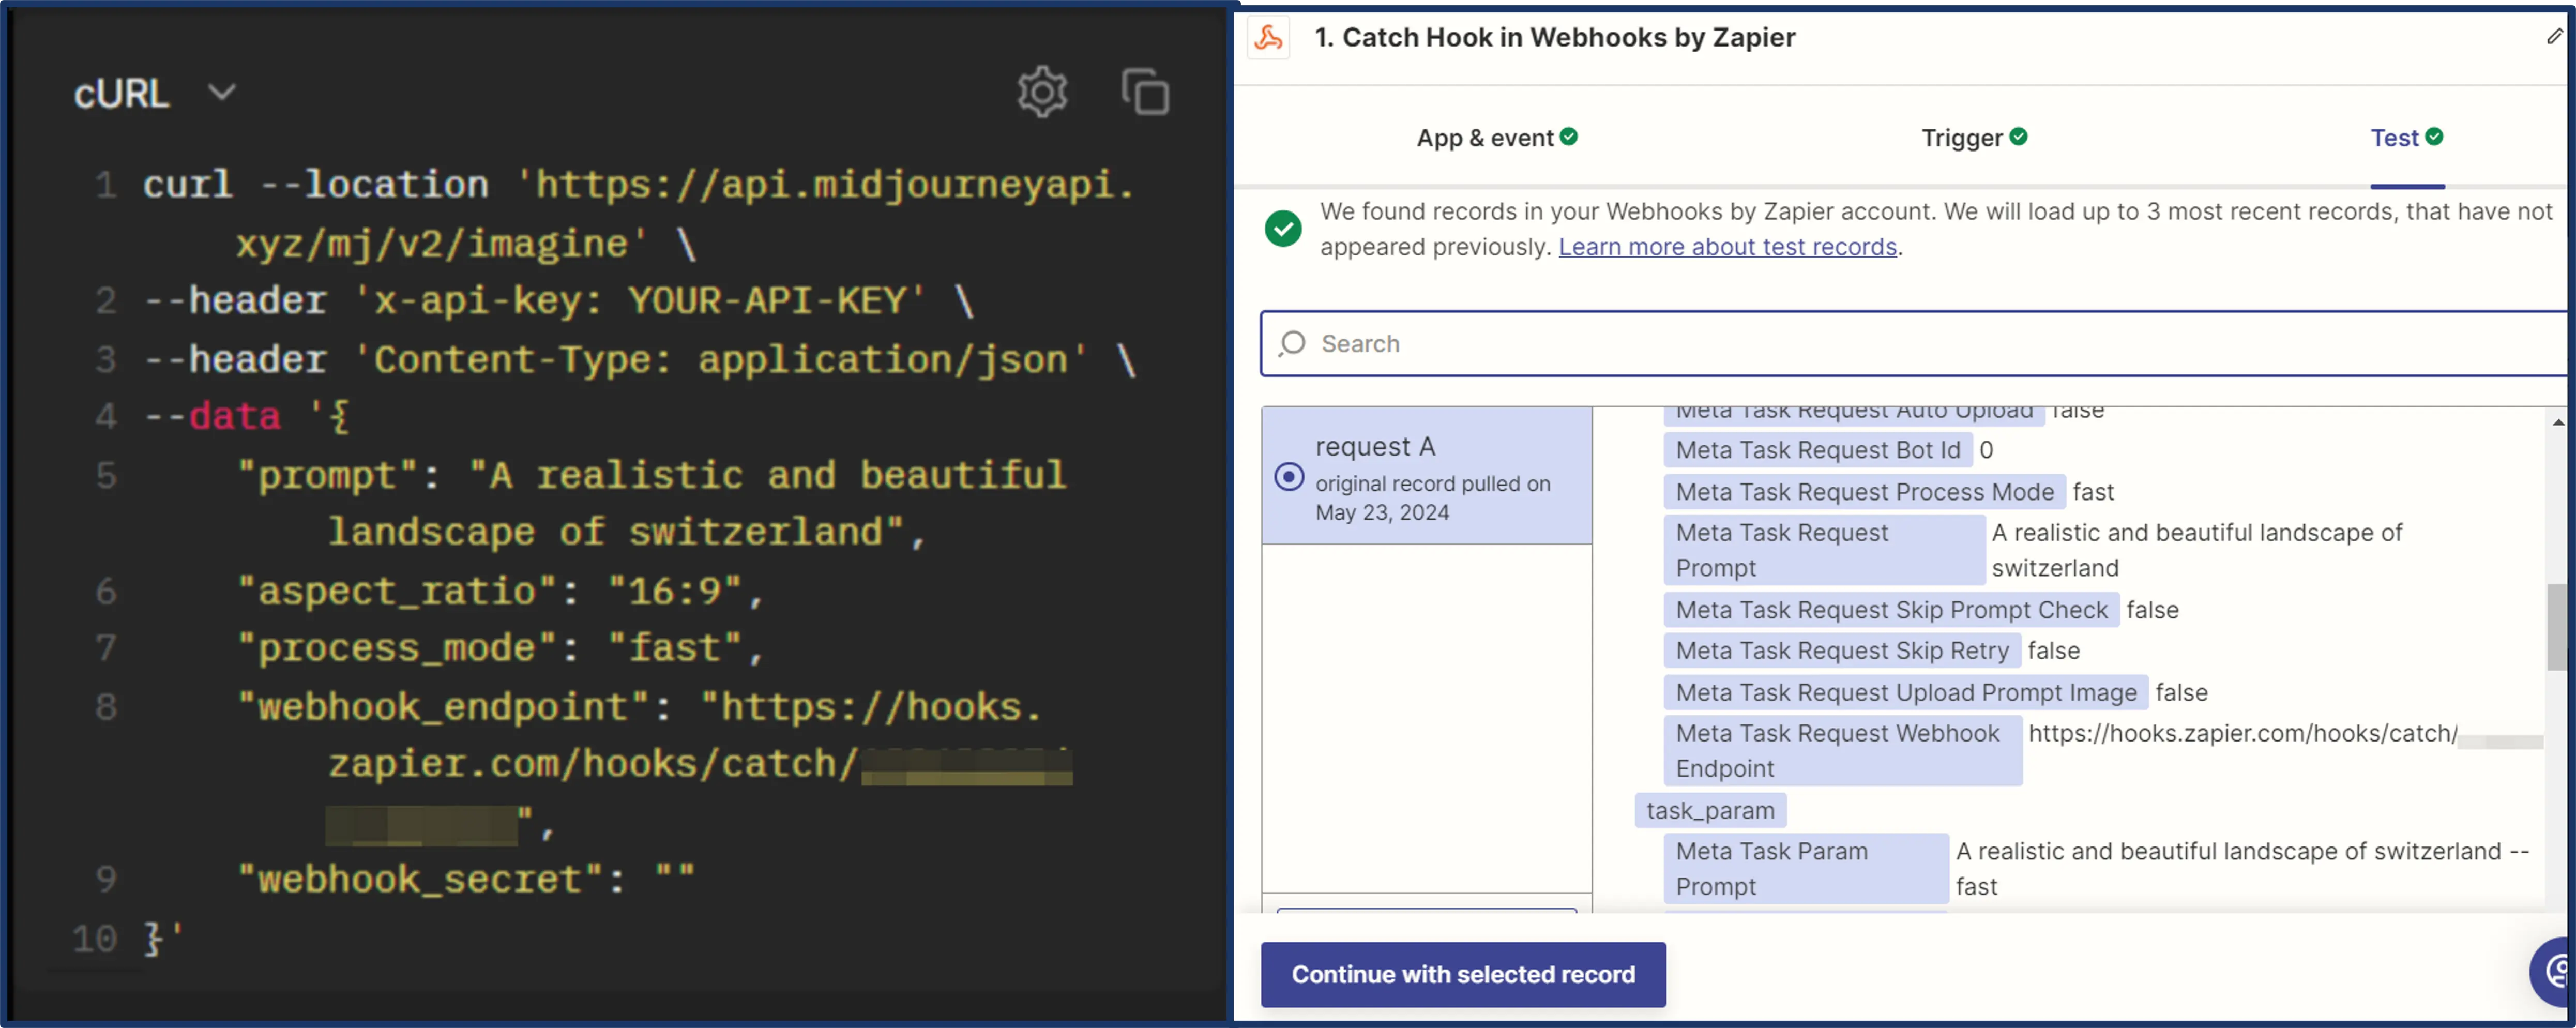
Copy the webhook URL provided by Zapier and insert it in your Midjourney's API imagine prompt and send the request. Once the task is completed, Zapier will be notified and the response will be shown in their test section under the Trigger box.
Once Zapier receives the response from the API, it records the request details and generates the data fields as per the API response structure. Then, you can proceed to the next step.
Configure an action
Once a trigger is activated, actions are carried out automatically to complete the desired task. The Actions events can include:
- Sending messages or notifications
- Perform any other functions supported by the connected apps in Zapier
So, click the Action box below the Trigger box.
Here, there are multiple connected apps you can choose from. For this tutorial we will stick to the Gmail event. So, click on the Gmail button.
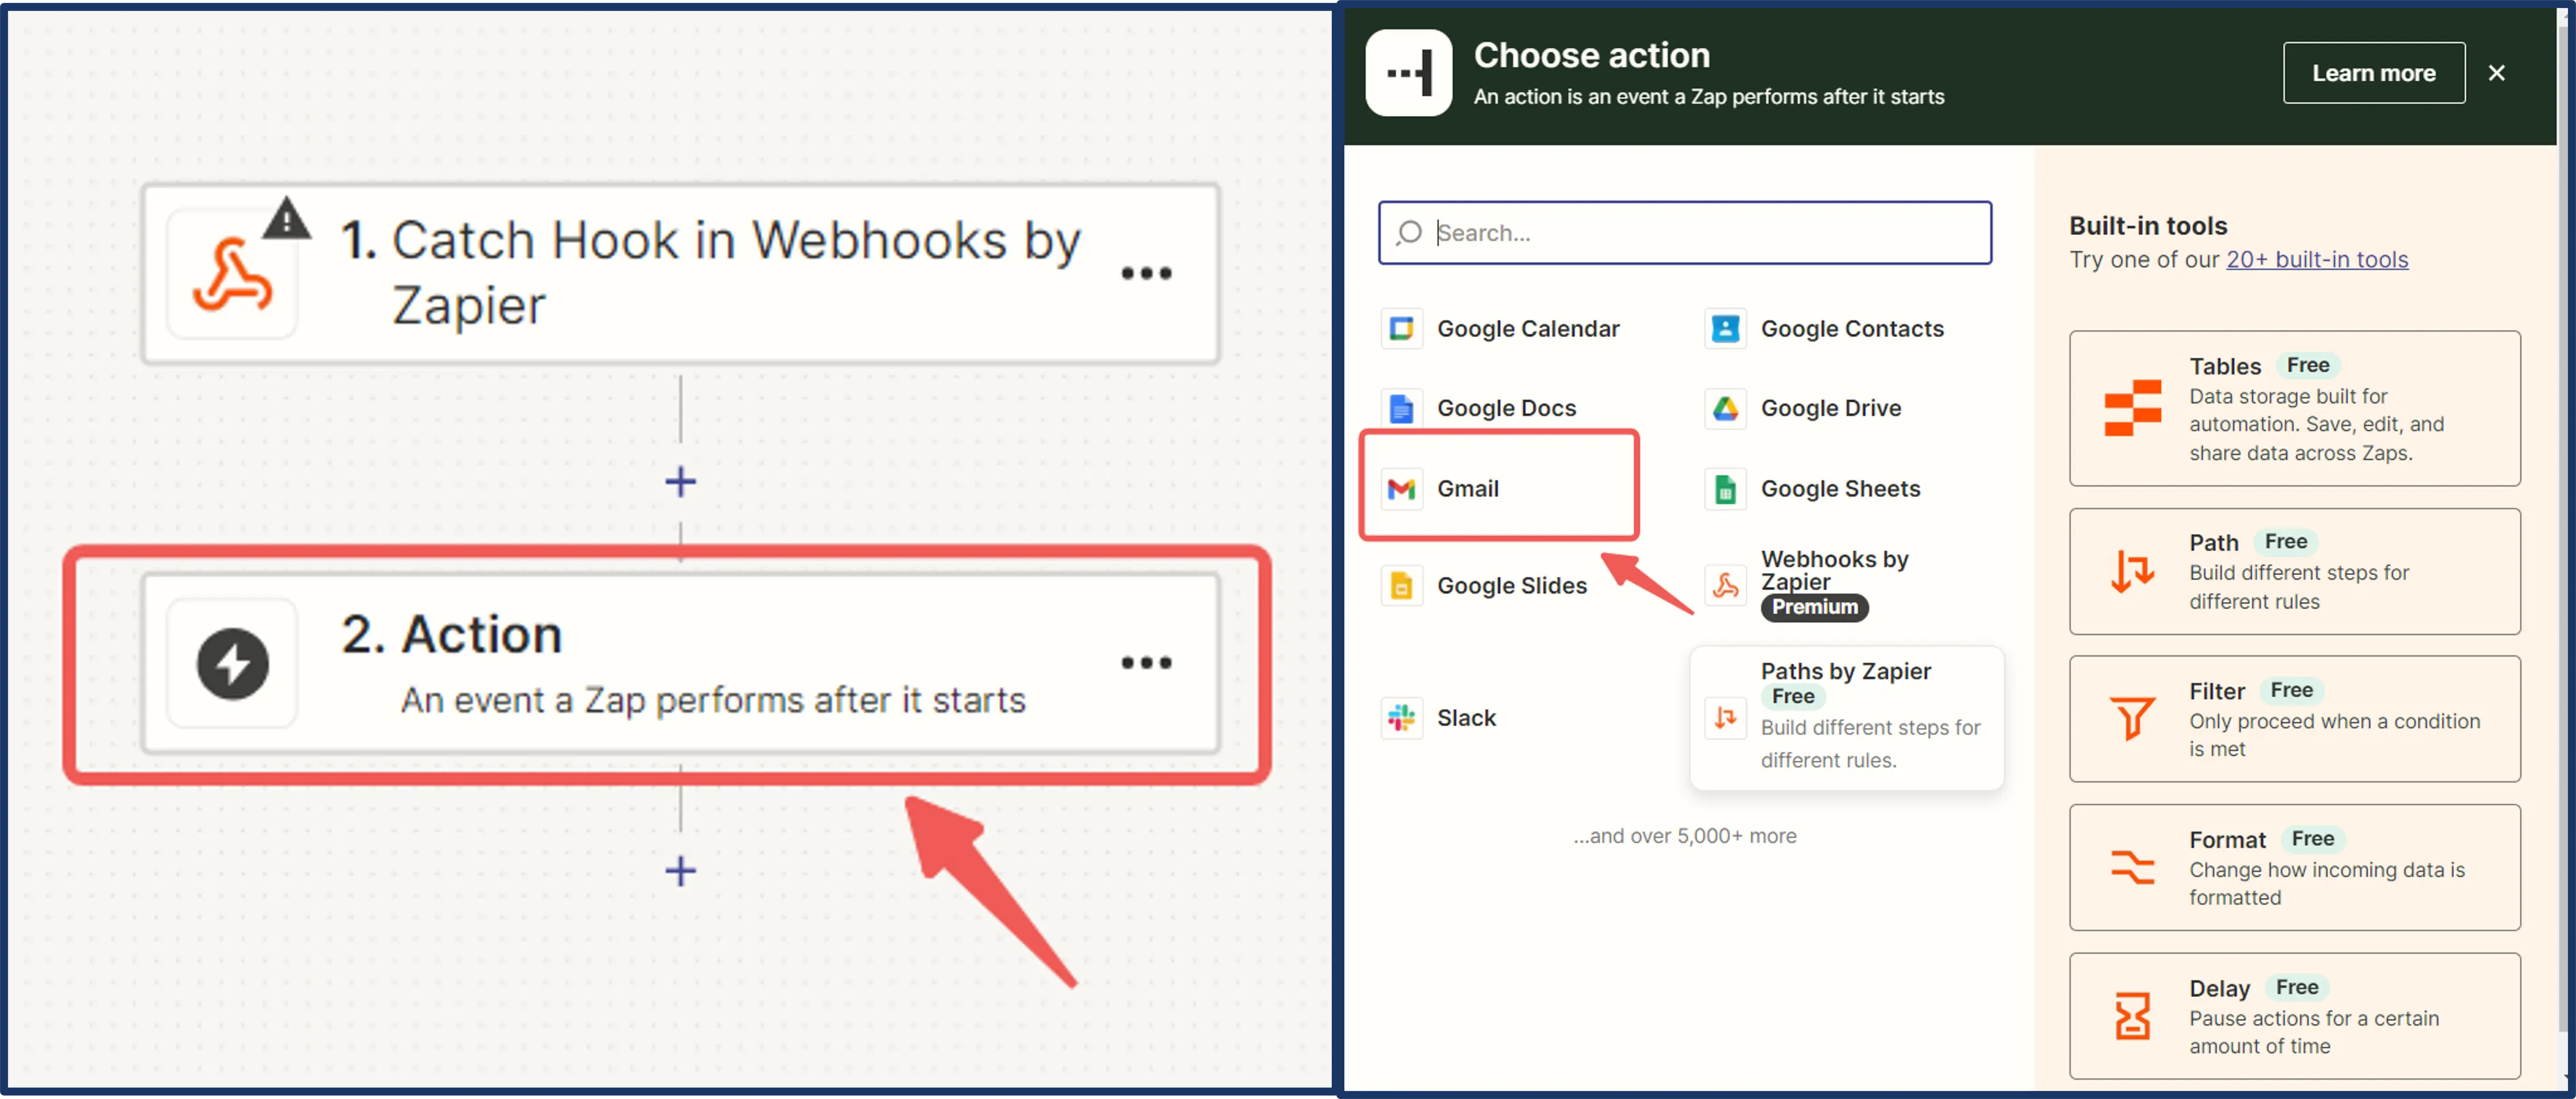
In the settings, select the Send Email event in the list of events and link your Gmail account in the next step (the Account step), then click continue.
The Action step is where you can enter the details of the email content. For now, I am going to send the email to myself, so I will enter the subject line and select the data fields I want from the the imagine task response (such as the task status, the result image URL, and the meta task request prompt) into the body section, and then click on continue.

Testing the action
Upon reaching the test page, you will see a confirmation notice that shows the email has been sent to the Gmail, and you can see what the email looks like in your inbox. As you can see from the images below, it works perfectly!

Now that the setup is done. Your Zap is now live! It will run automatically whenever the specified trigger event occurs. You can also return to the editor to make changes or turn it off if required.
Conclusion
With this tutorial, you are now able to integrate PiAPI's Midjourney API into Zapier's automation workflow platform.
Thank you for reading through this tutorial - if you find this content enjoyable and would like to try out PiAPI's Midjourney API, don't hesitate to sign up for our workspace!
Also, if you are interested in Guide and Library for Midjourney Style Reference, check out MidjourneySref!
