How to use Faceswap API from PiAPI with Postman


Hi developers! We are very delighted to make this tutorial to show how you can use PiAPI's Faceswap API with Postman!
Before we dive into this tutorial, do sign up for our Workspace, obtain your API Key, and check out the documentation for our Faceswap API endpoints.
Now, let's get started!
Tutorial
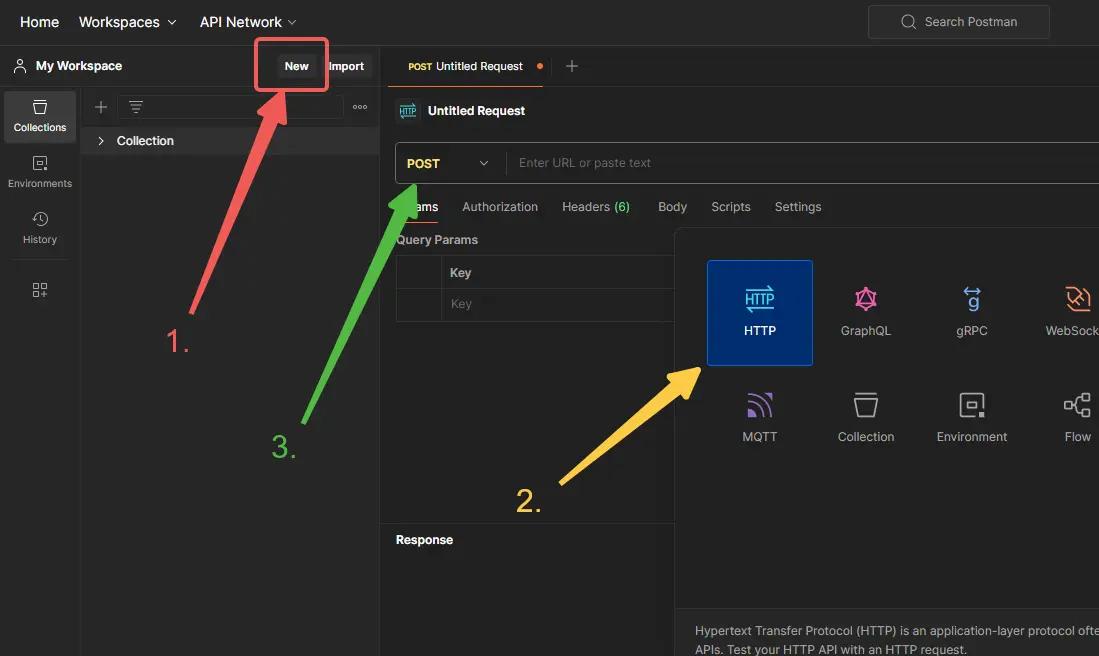
Firstly, you will need to open up or download Postman. Click the "New" button on the top left of your screen and create a new HTTP request, then change the request type to "POST".
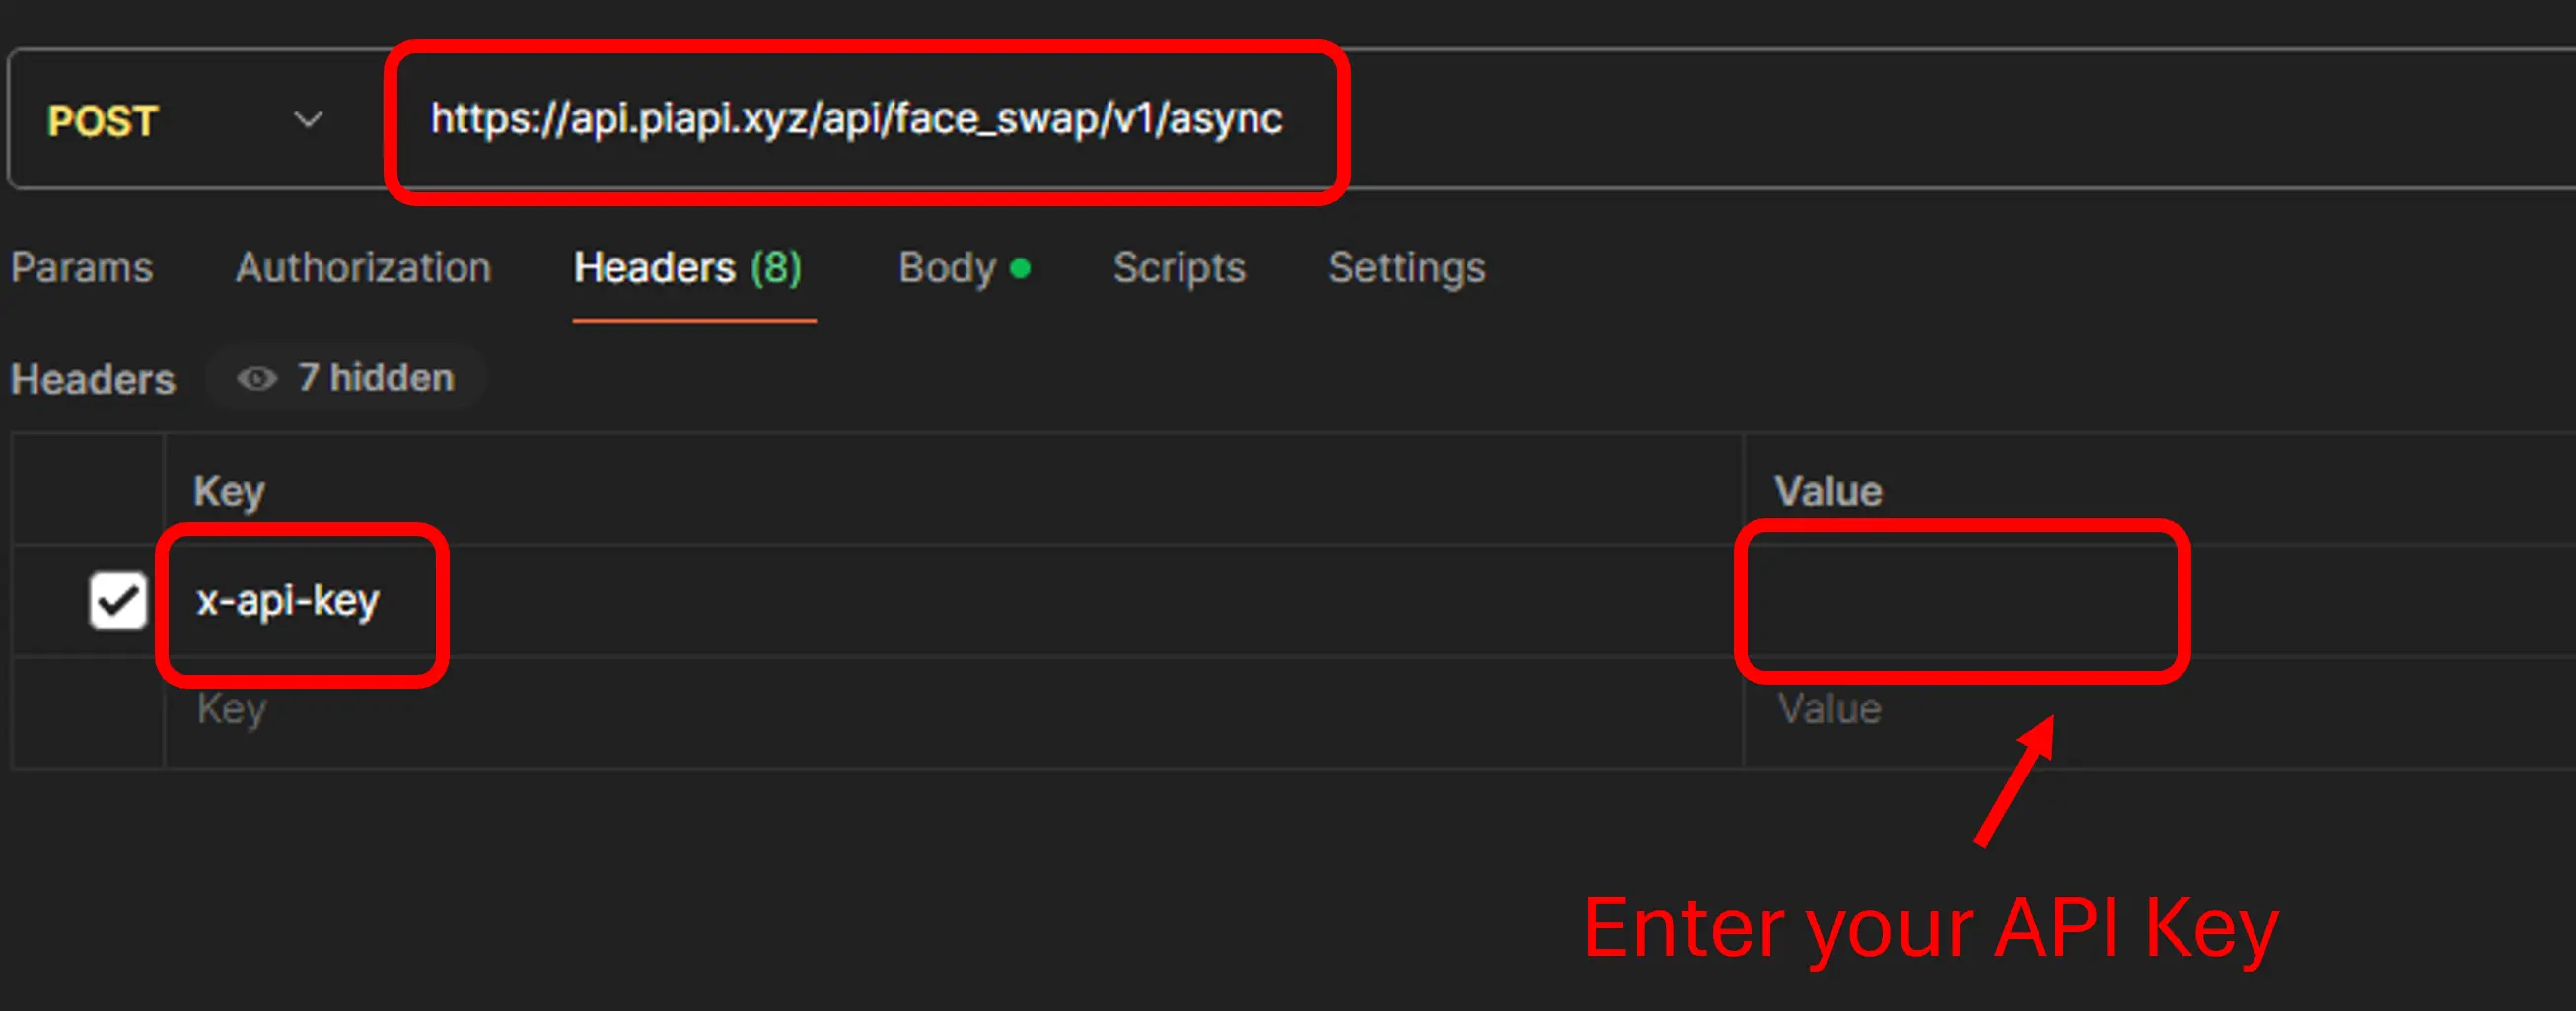
Enter the Faceswap API's endpoint address from our docs into the endpoint input field, click on "Headers" and type "x-api-key" in the empty space under the "Key" text and enter your API Key under the "Value" text as shown in the example below.
Next, click on "Body" located below the endpoint address, then click on "raw", copy the code from our docs and insert it into the body section. Press "Send", then a task id will be returned to you in the response section, and you will need to keep it for later use. Once you're done, proceed to the next step.

Now, we are going to fetch for the task that has been submitted. You will need to create a new HTTP request, change the request type to "POST", then copy the fetch endpoint URL from our docs into the endpoint input field, similar to the above steps.
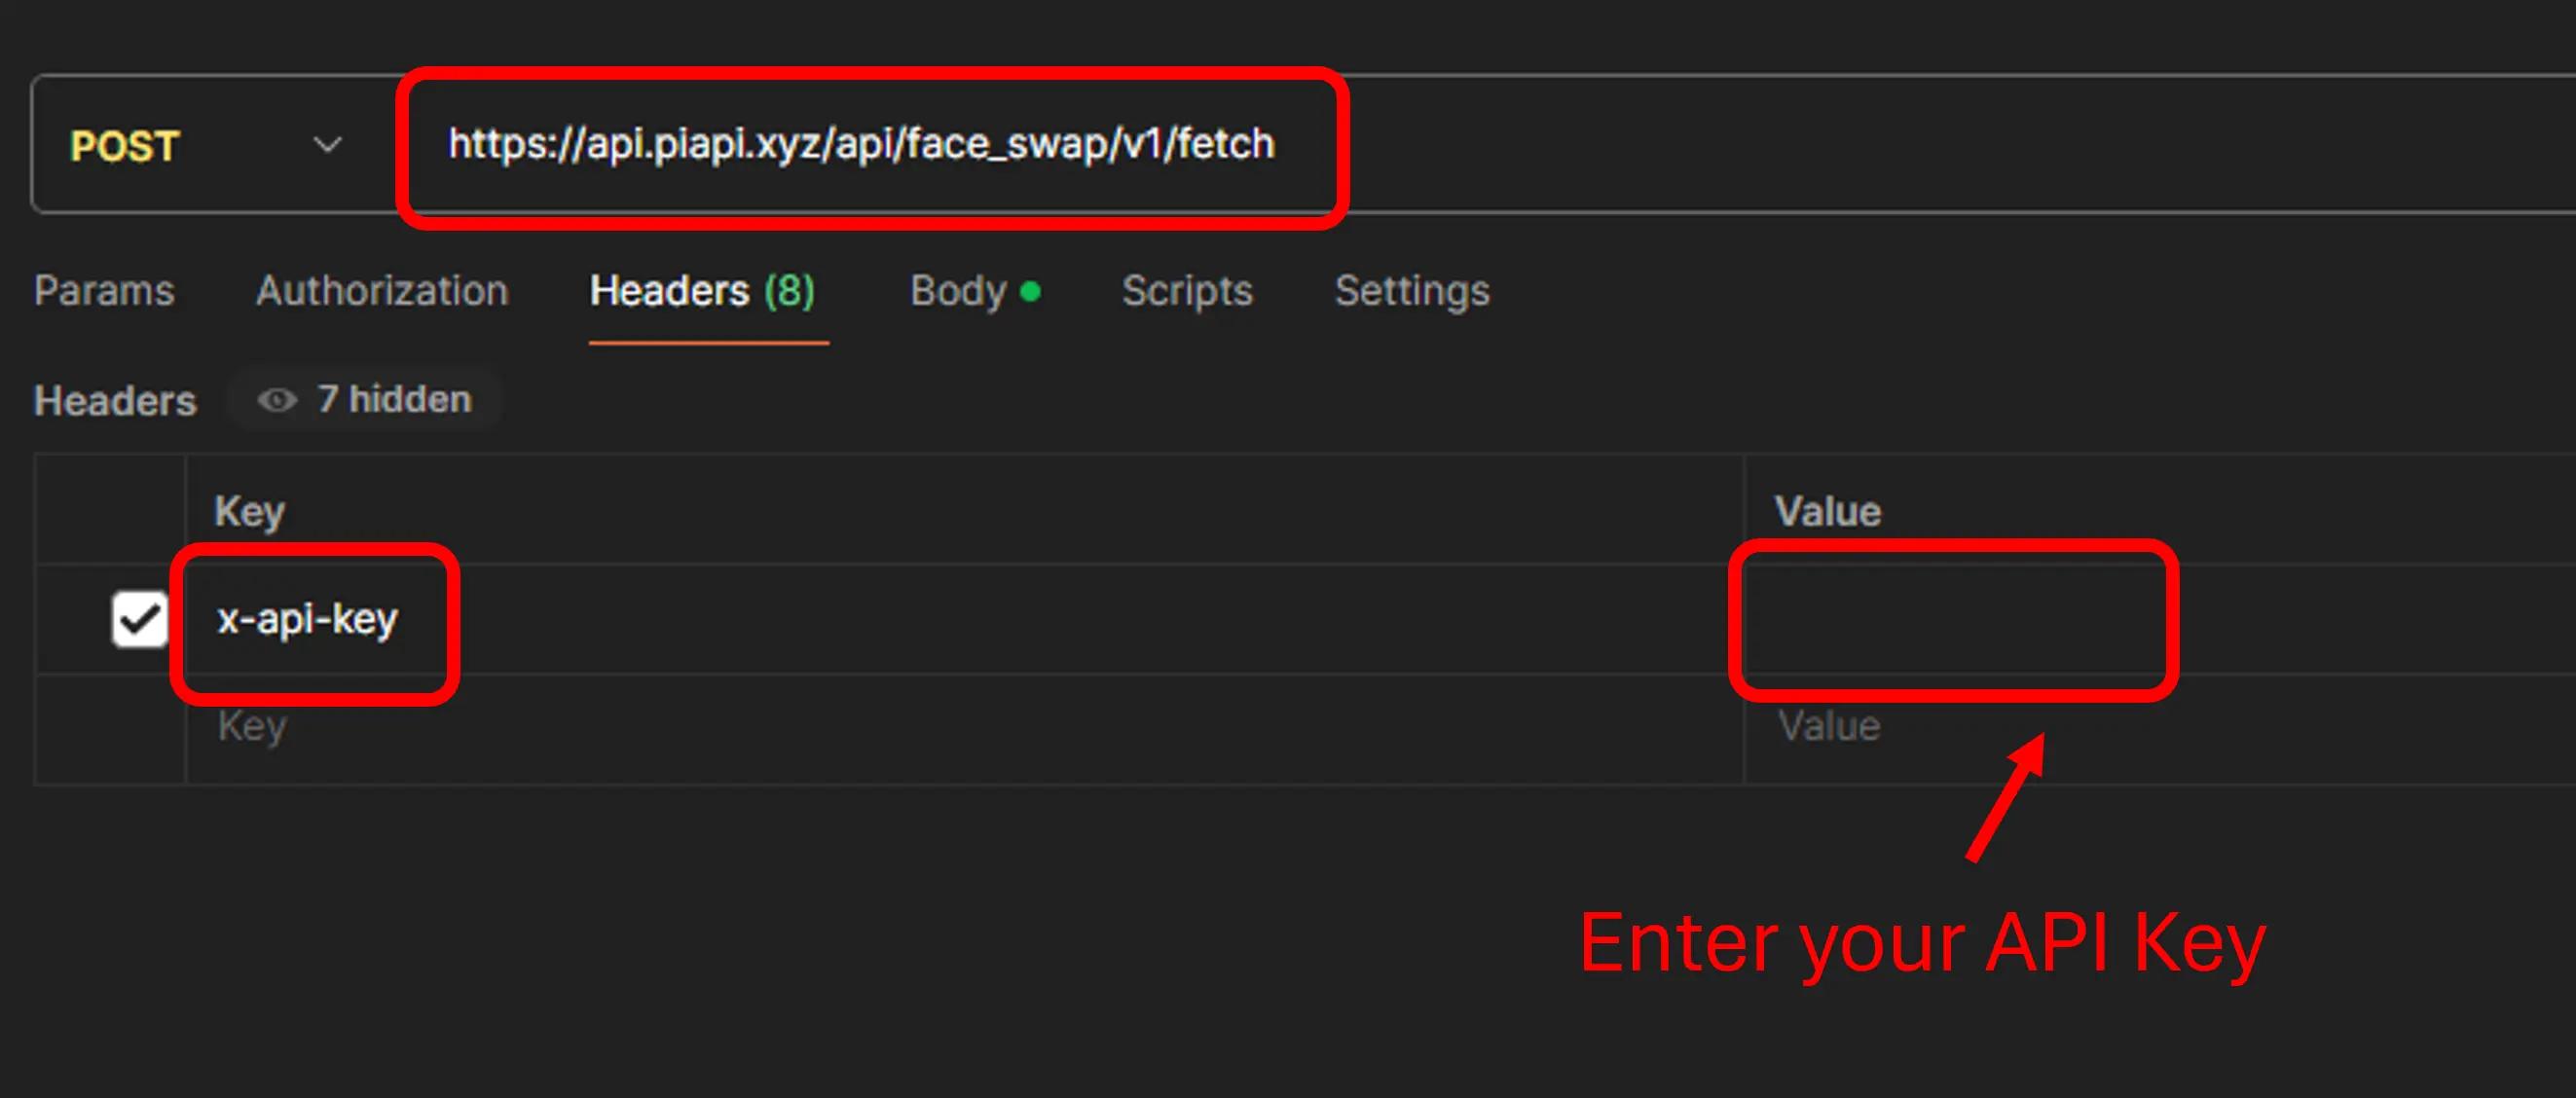
Then, enter the saved task id response into the body of the fetch endpoint, and press "Send". Once the result status shows "finished", you may copy the returned URL (as per arrow below) into a web browser and see your face-swapped image!
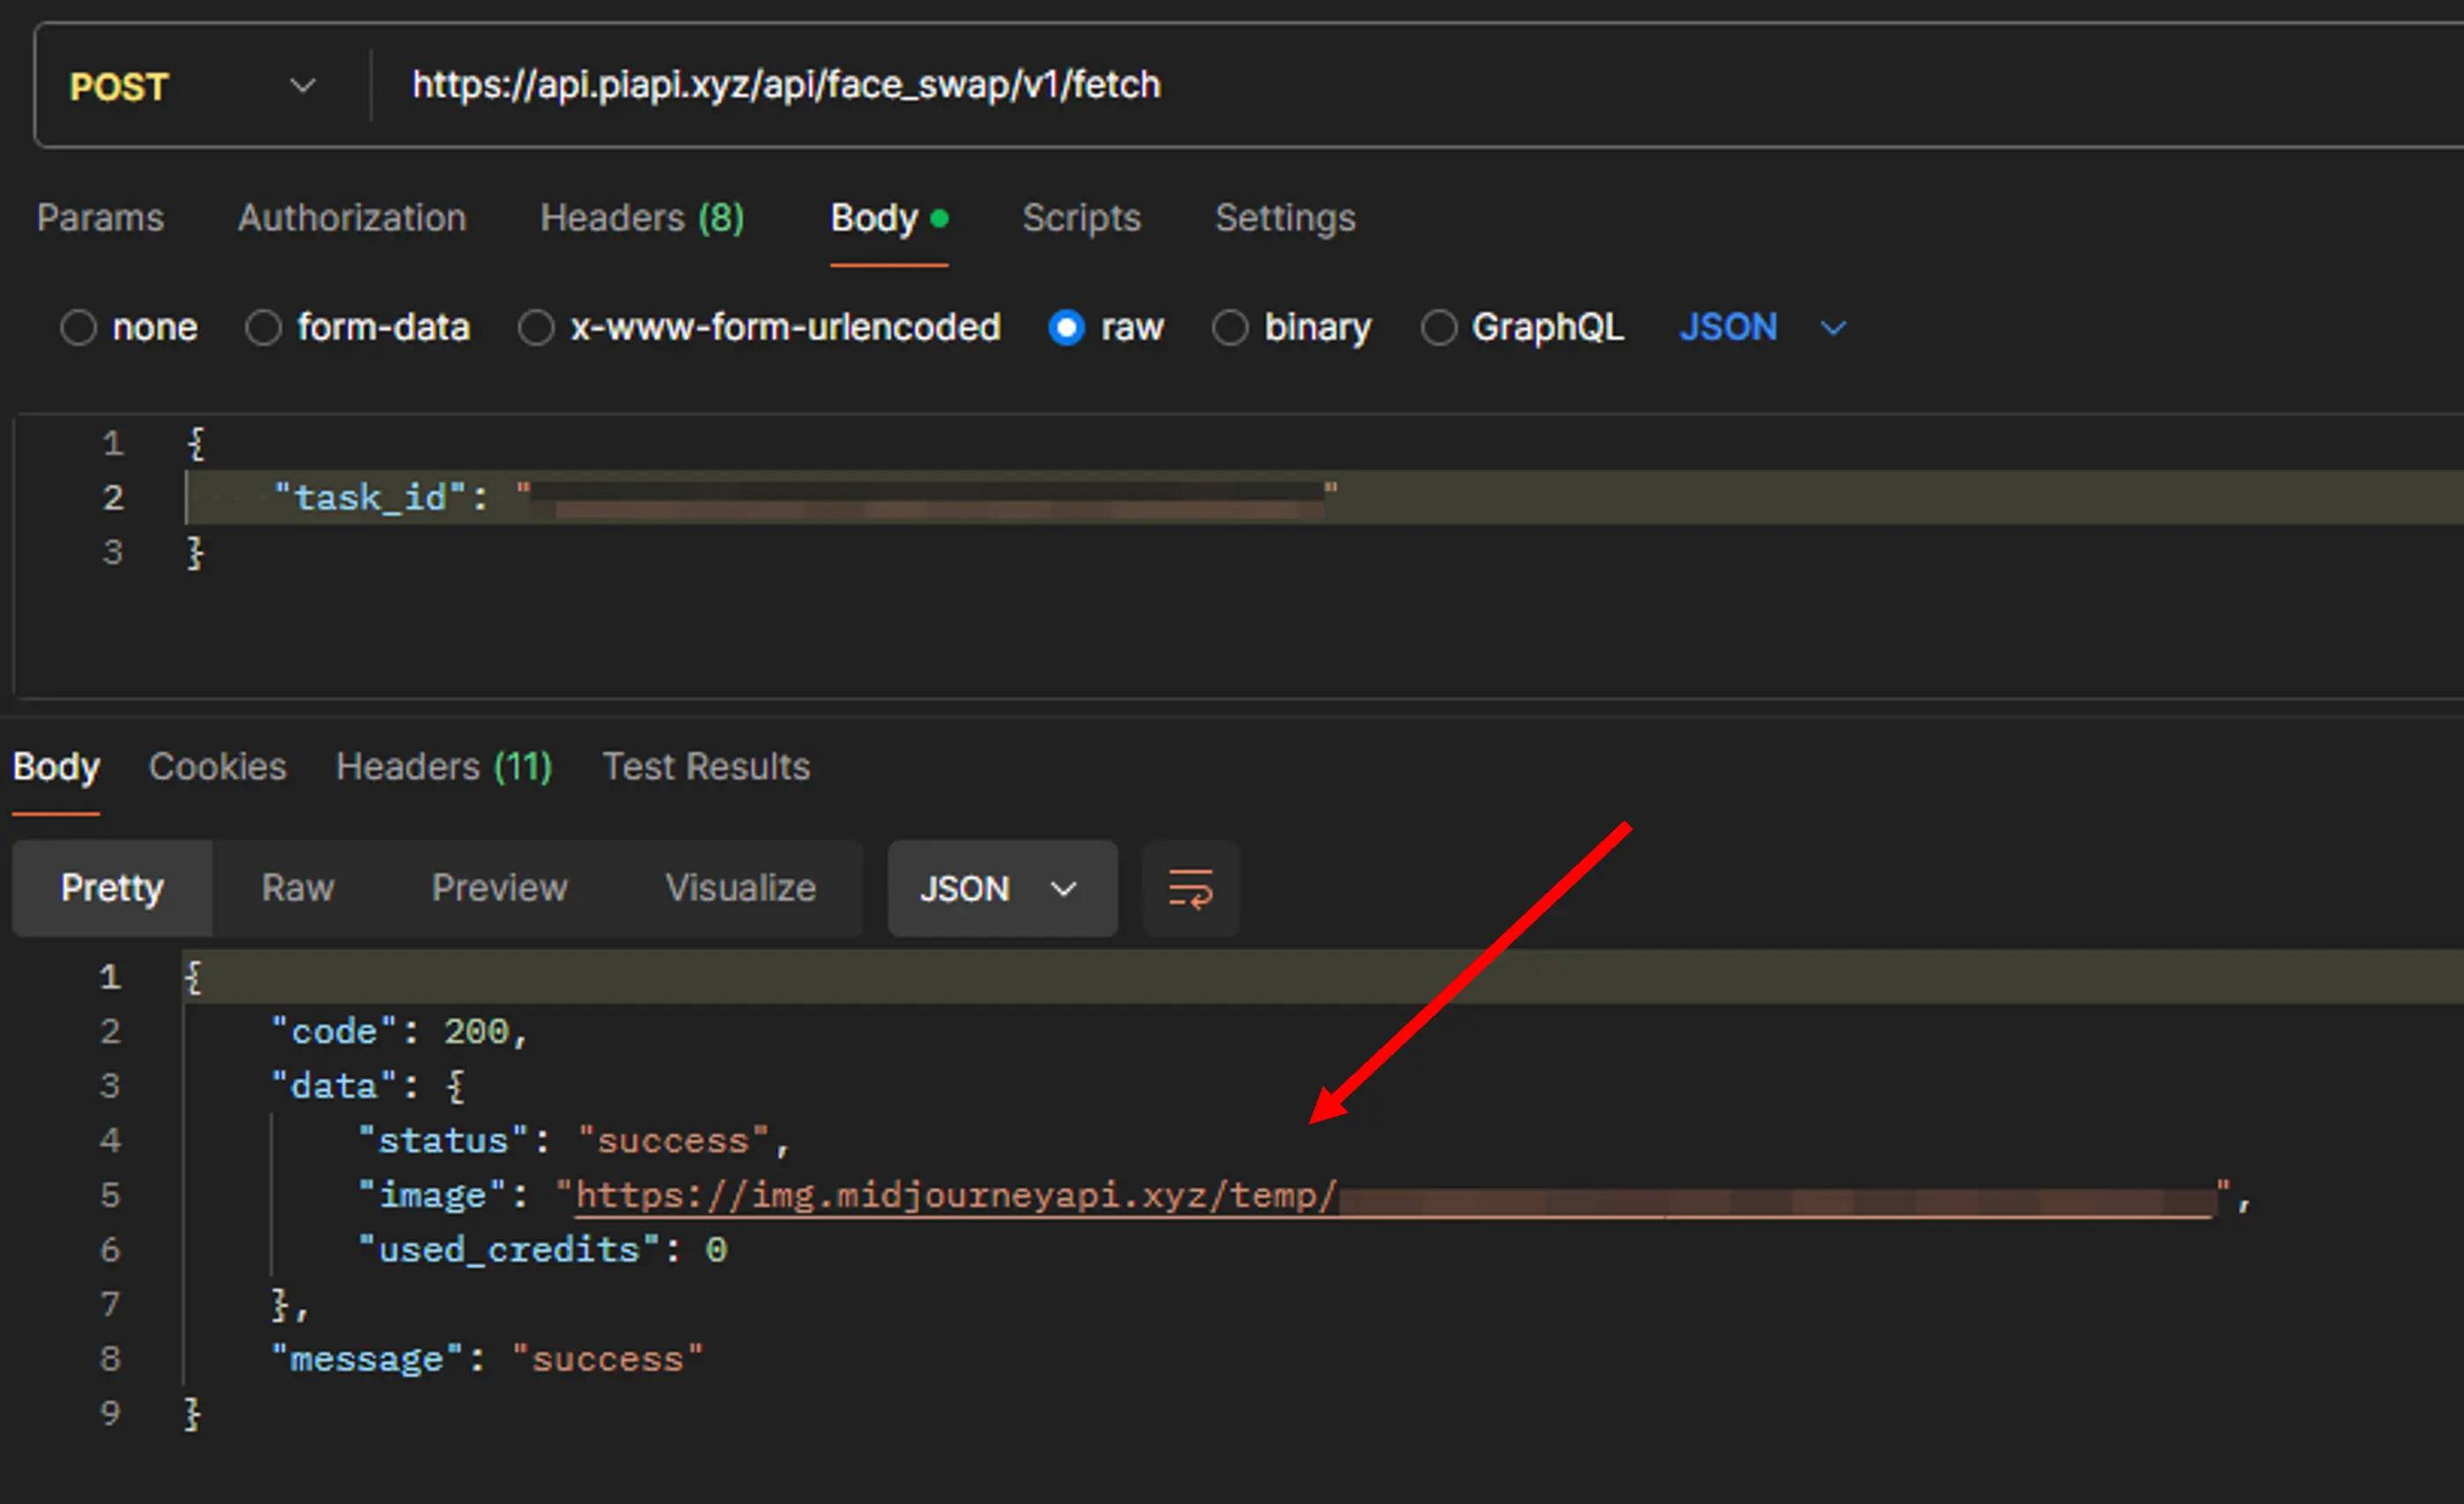
Note: As you are sending the fetch request, if the returned "status" is either "pending" or "processing", then you should wait for a moment before you re-send the request again.
Conclusion
If you are wondering about pricing, please check out our Faceswap page's pricing section for more information. We also provide custom dedicated deployment service to users who need solutions for specific requirements (ex. low latency, high concurrency, shorter queuing time).
And this is how you can get started using PiAPI's Faceswap API with Postman! Thank you for reading through this tutorial. Do share with people who find this helpful and don't be shy to contact us with any feedback you might have!
