The Motion Brush Feature through Kling API


Introduction
Kling's Motion Brush is a newly introduced tool, launched by Kuaishou on September 19, 2024, alongside the release of Kling 1.5.
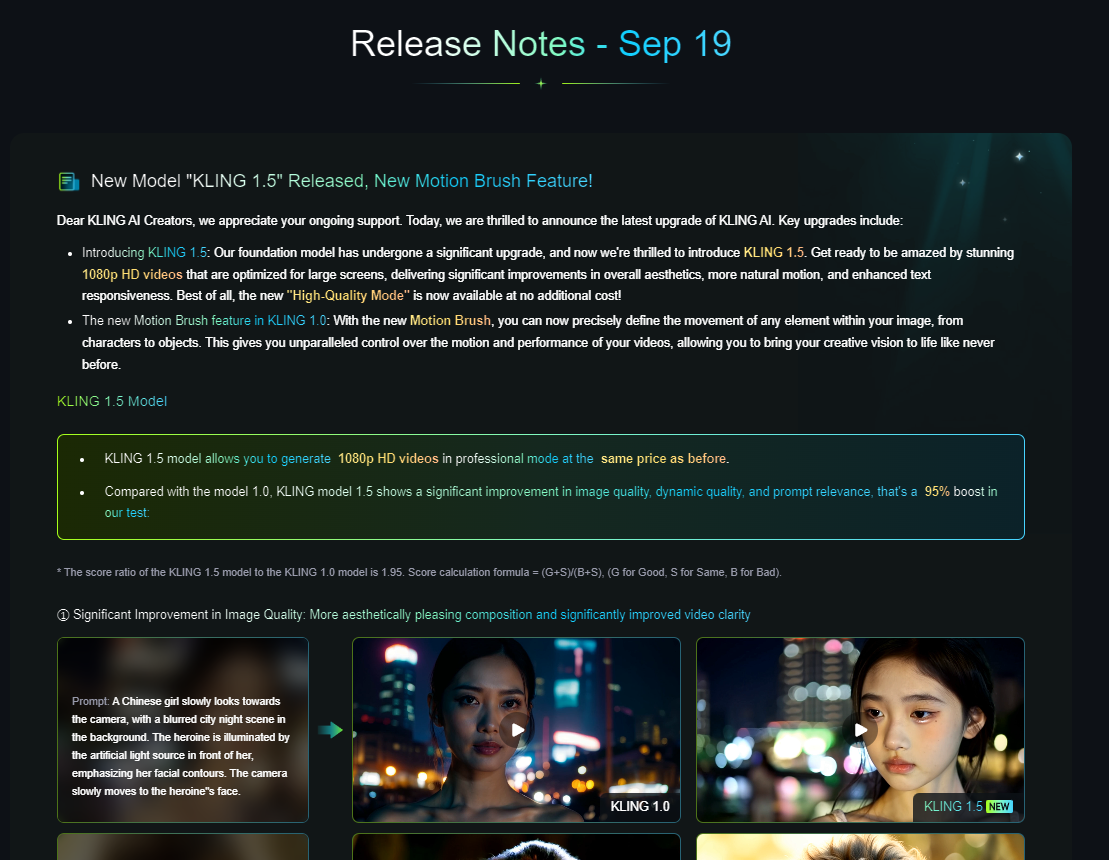
PiAPI's Host-Your-Account users already have access to the Kling 1.5 API. However, the motion brush feature will be available to our API users by around October 8, 2024.
In this blog, we’ll dive into what the motion brush tool is and compare the results with and without it to see just how much it enhances the AI's performance.
What is the Kling Motion Brush Feature?
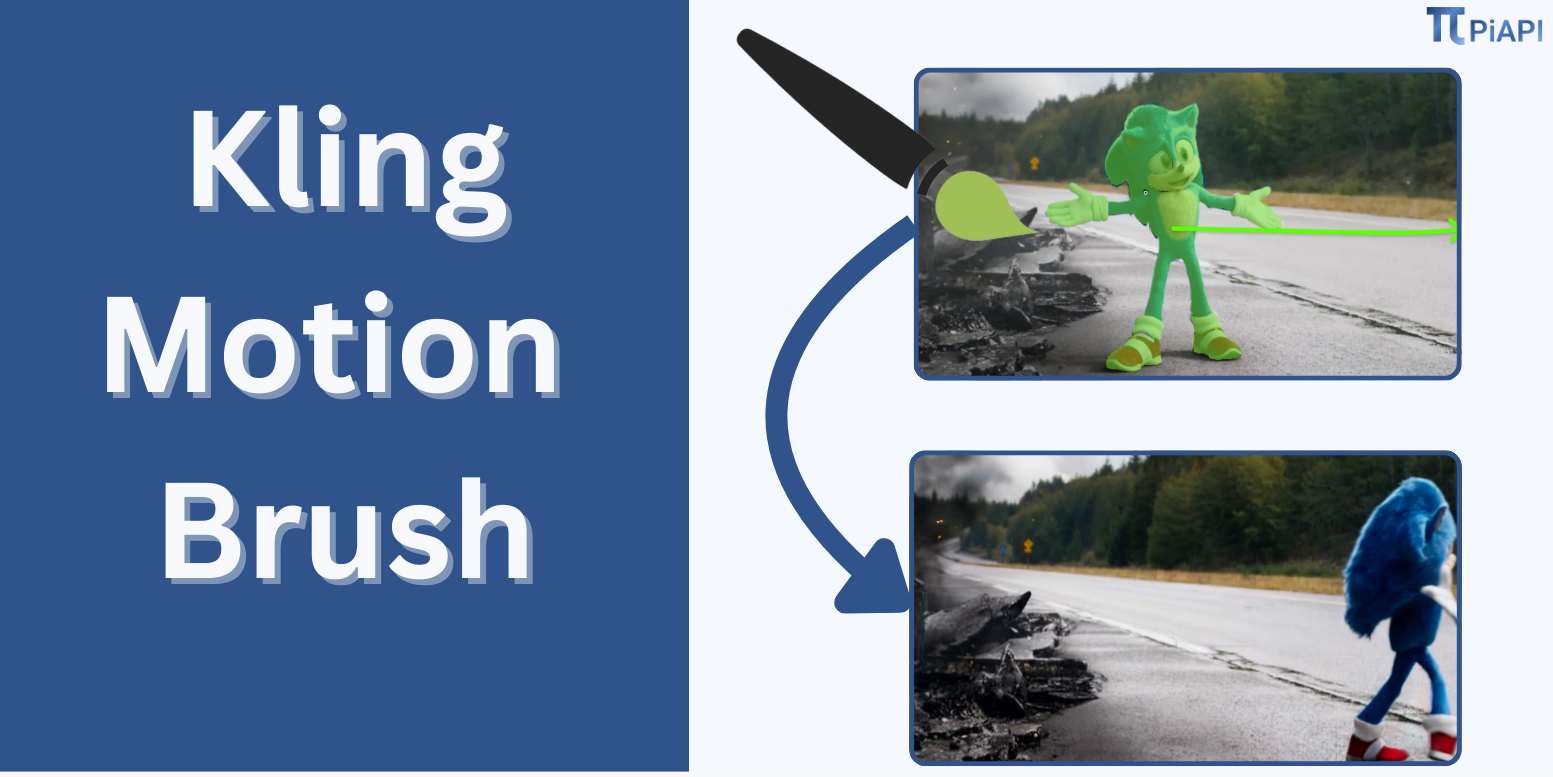
Kling Motion Brush is a new feature in Kling’s image-to-video generative AI, currently available only in Kling 1.0 and not yet supported in Kling 1.5. This tool enables users to set movement paths for specific elements in the video.
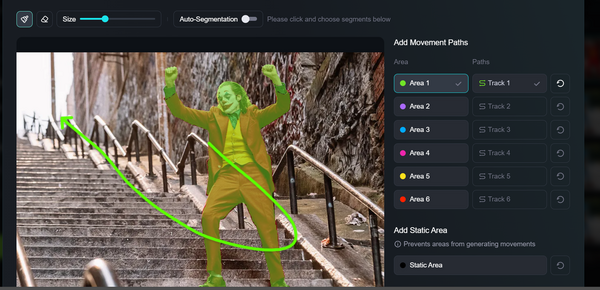
By brushing over an area manually or using auto-segmentation, you can select the object in the image you want to move, then choose a path to set its movement directions.
In addition to setting movement paths, users can also apply the static brush, which stops the selected parts from moving.
In theory, this level of control allows users to create more dynamic motion, bringing still images to life with more movement precision. If you are interested in learning how to use the tool more effectively, we recommend checking out Kuaishou's Official Motion Brush User Guide.
With this in mind, we'll now examine the image-to-video evaluation framework which serves as the foundation for analyzing the effectiveness of the Kling Motion Brush.
Image-to-Video Evaluation Framework
For this comparison, we have taken the AIGCBench (Artificial Intelligence Generated Content Bench), an evaluation framework designed for AI-generated Image-to-Video content.
Although this is a framework designed to be used by computers, we've adjusted it for human evaluation, adapting it from an automated system into a manual process. Below are the four criteria the framework used, along with explanations for each.
Control-Video Alignment
We would assess how closely the output video aligns with the provided text prompt and image. This benchmark is essentially the same as the "prompt adherence" metric from our previous blog comparing Luma Dream Machine 1.5 vs 1.0.
Motion Affects
We evaluate whether the motion in the video is dynamic, realistic, smooth, and consistent with real-world physics.
Temporal Consistency
We'll assess whether adjacent frames show high coherence, maintain continuity throughout the video, and remain free of any visible artifacts, distortions, and errors.
Video Quality
This metric is straightforward - we check if the video has a high resolution and check for any blurring.
Same Prompt Comparison
With the evaluation framework established, let's now outline our comparison method. We will have three comparison examples, all based on popular cultural trends. Within each example, we will compare the output of three different workflows shown below:
- Workflow 1 - Kling 1.0 without Motion Brush
- Workflow 2 - Kling 1.0 with Motion Brush
- Workflow 3 - Kling 1.5 without Motion Brush
All workflows within each example will use the same prompt and input image. We will express how we want the object to move with clear textual commands in the prompt. Workflow 1 & 3 will have to rely only on the prompt, whereas Workflow 2 will rely on the prompt and the motion path drawn. This is how we can compare how much improvement the motion brush feature brings.
Note, Kuaishou's official guide (Motion Brush User Guide) also advises that when using the motion brush feature, the user still should specify the desired movement in the prompt for optimal performance. Our Workflow 2 adheres to this recommended practice.
Now that you're familiar with our approach, let's jump right into the examples.
Example 1: Joker Folie à Deux
Because we are very excited about the upcoming release of Joker 2, thus for this example, we've chosen to revisit the iconic stair scene from the original Joker film.
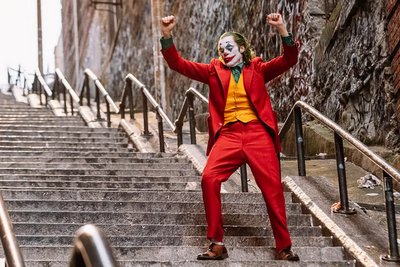
Below is the image that we have found of Joaquin Phoenix's Joker on the stairs, which we'll use with a prompt to generate the videos for three workflows in this example.
The screenshot of the motion brush settings that we used for Workflow 2 (the Kling 1.0 model with Motion Brush) is shown as follows. As the green path illustrates, we intend the Joker to turn around and walk up the stairs.
And here are the output videos of the three workflows, with the prompt used shown in the description.
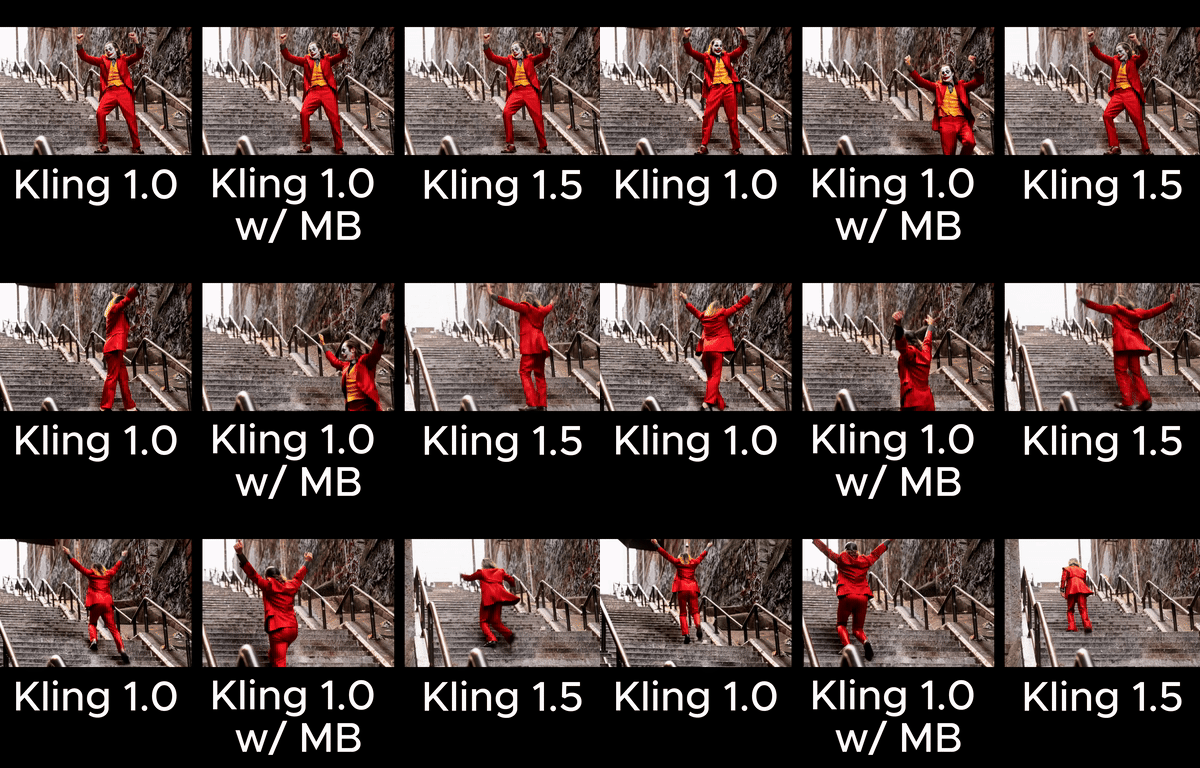
As discussed in the evaluation framework section, the following is our analysis:
Control-Video Alignment
All three videos have the Joker walking up the stairs with his back facing the camera. But none show the slow zoom-out specified in the prompt.
Motion Effects
All three versions have smooth, realistic motion, which are consistent with real-world physics, without any abrupt movements.
Temporal Consistency
The videos are free of flickering, abrupt transitions, or artifacts, maintaining high frame-to-frame consistency. Although the Joker seems to be turning around a bit slower than usual in the first video.
Video Quality
While Kling 1.5 provides 1080p, the other two are limited to 720p. None of the videos above show any signs of blurring.
Overall, there doesn't seem to be much difference in this example for all four criteria.
Example 2: NFL Wallpaper
The NFL season just kicked off, and we’re having so much fun watching it that we decided to create animated NFL wallpapers for this example.
Below is an image generated using Midjourney API of the Dallas Cowboy Wallpaper, which we'll use with a prompt to generate the videos for three workflows in this example.
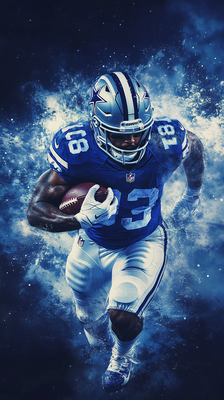
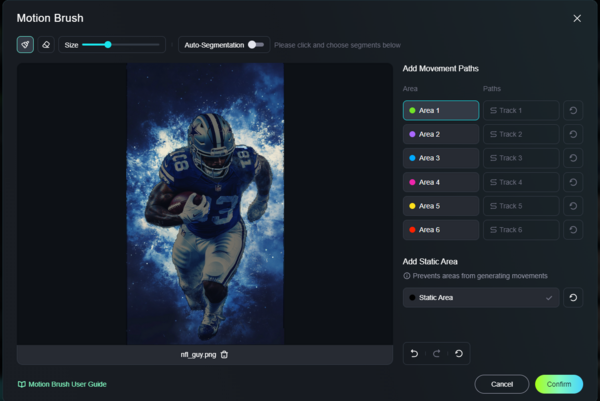
The screenshot below shows the motion brush settings we used for workflow 2 (the Kling 1.0 model with Motion Brush). We've used the static brush to keep the NFL player in the center stationary.
And here are the video outputs for the three workflows.
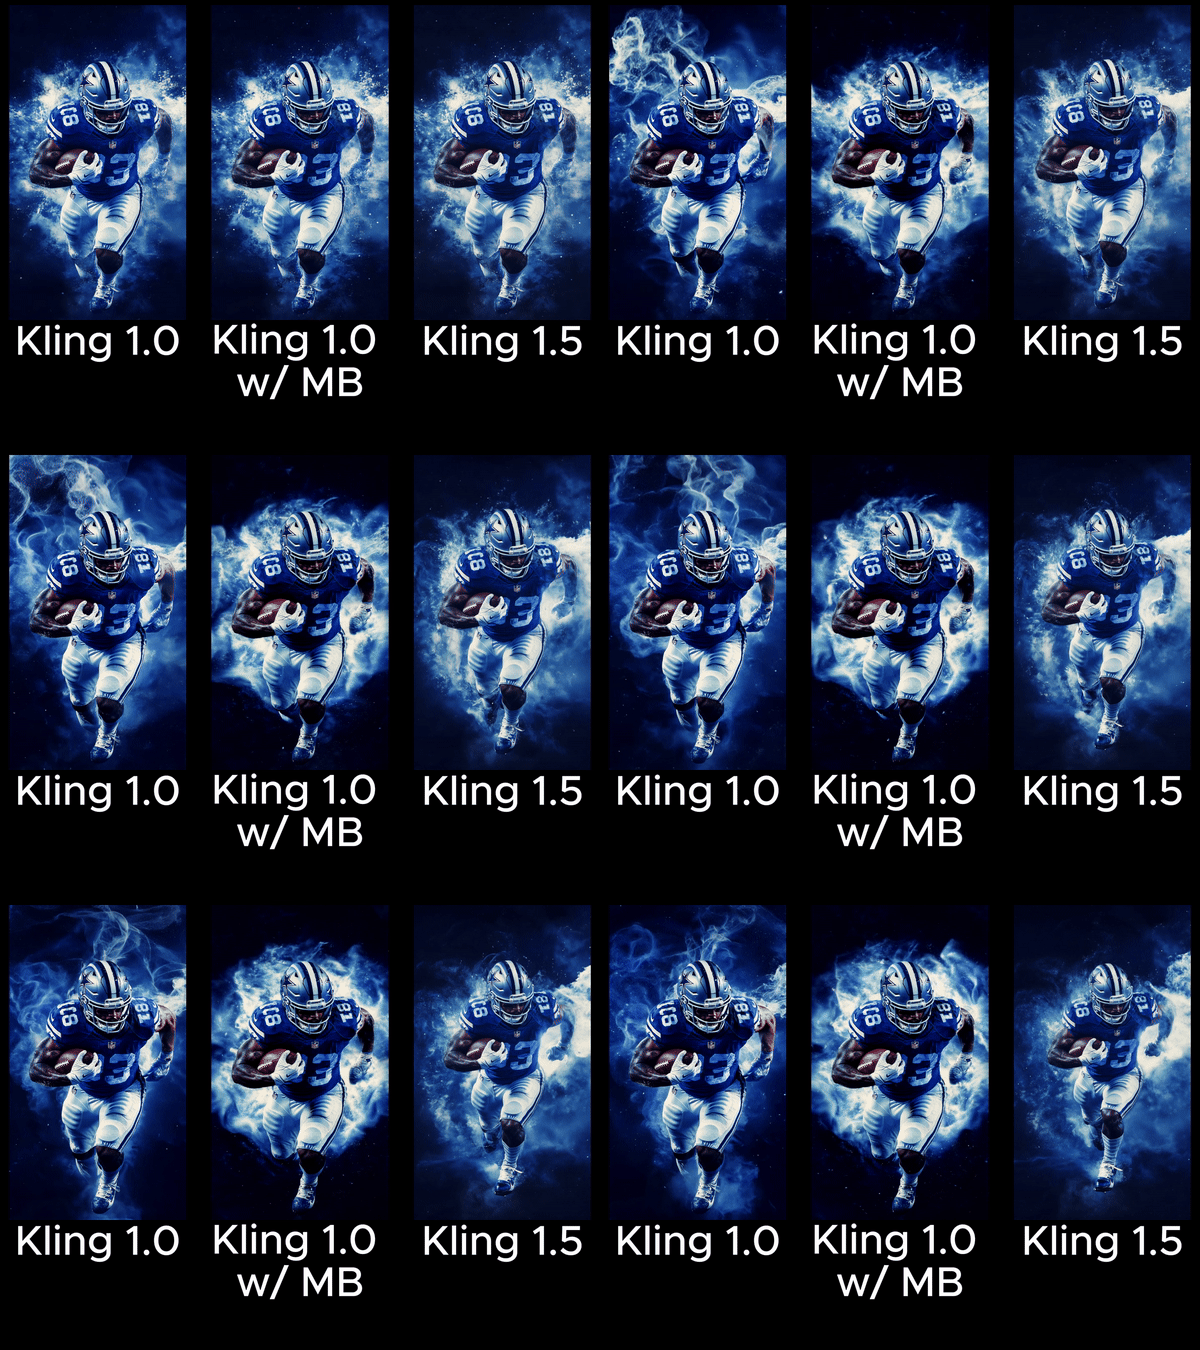
As discussed in the evaluation framework section, the following is our analysis:
Control-Video Alignment
Workflow 2 (Kling 1.0 w/ Motion Brush) delivers the best Control-Video Alignment, with the NFL player staying completely still and the background creating the most convincing loop. Workflow 1 (Kling 1.0 w/o Motion Brush) also performed well. But if you look closely, the NFL player has slight movements, and the background loop isn’t as smooth as in Workflow 2. Meanwhile, Workflow 3 (Kling 1.5 w/o Motion Brush) has poor alignment, as the NFL player’s visible movement prevents a seamless loop when used as a wallpaper.
Motion Effects
All three versions have realistic and smooth motion, with no unnatural movements visible.
Temporal Consistency
None of the three videos show flickering, abrupt transitions, or artifacts, maintaining high frame-to-frame coherence.
Video Quality
Kling 1.5 outputs in 1080p, unlike the other two, which are restricted to 720p. None of the videos display any blurring.
Overall, for creating animated wallpapers, using motion brush seems like the clear choice since it lets you control which parts remain static, resulting in a more seamless loop.
Example 3: Sonic the Hedgehog 3
As Sonic 3 races toward theaters, we picked a scene from the original movie as an example. Being longtime Sonic fans, we felt this was the perfect time to showcase him!
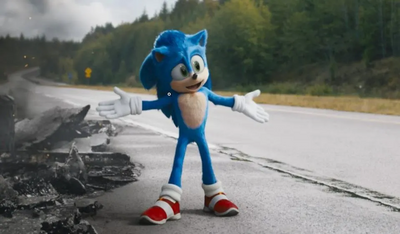
Below is an image that we have found of Sonic, which we'll use with a prompt to generate the videos for three workflows in this example.
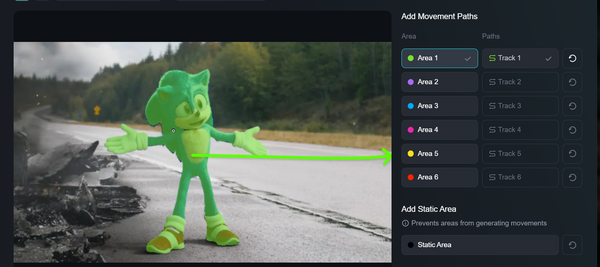
The screenshot below shows the motion brush settings that we used for Workflow 2 (the Kling 1.0 model with Motion Brush). As the green path illustrates, we intend Sonic to walk offscreen to the right.
And here are the output videos for the three workflows.
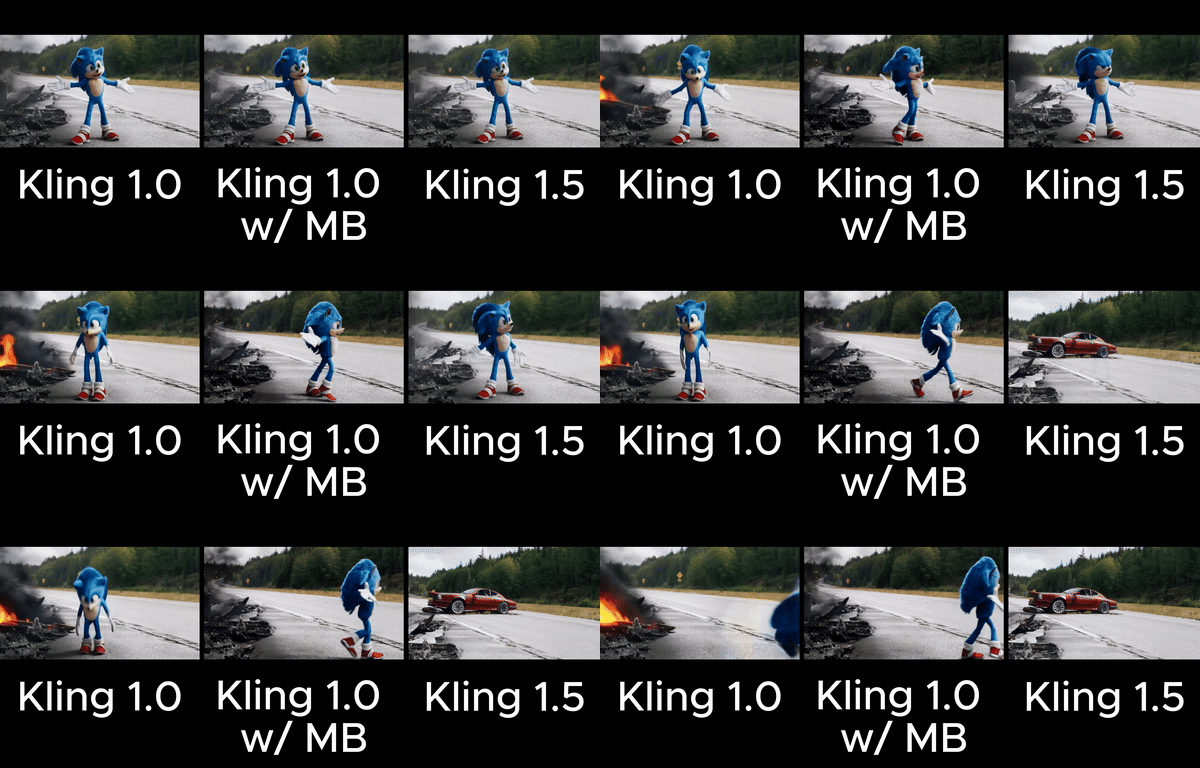
As discussed in the evaluation framework section, the following is our analysis:
Control-Video Alignment
Both Workflow 1 (Kling 1.0 w/o Motion Brush) and Workflow 2 (Kling 1.0 with Motion Brush) show strong Control-Video Alignment, as Sonic walks offscreen to the right in both cases. In contrast, Workflow 3 (Kling 1.5 w/o Motion Brush) shows the lowest level of Control-Video Alignment, with Sonic disappearing offscreen instead of walking off.
Motion Effects
Workflow 2 (Kling 1.0 with Motion Brush) performs best in this criterion, as Sonic walks offscreen naturally. In Workflow 3 (Kling 1.5 w/o Motion Brush), Sonic’s movements are natural, but he disappears rather than walking away. However, in Workflow 1 (Kling 1.0 w/o Motion Brush), Sonic’s legs shorten, and his body morphs unnaturally before walking offscreen.
Temporal Consistency
Workflows 1 and 2 maintain strong temporal consistency without any abrupt disruptions. However, Workflow 3 contains a sudden transition where Sonic disappears, and a red car takes his place.
Video Quality
Kling 1.5 provides 1080p resolution, compared to the other two restricted to 720p, and all videos are free from blurring.
In this example, Workflow 2 (Kling 1.0 with Motion Brush) has the best output, with Sonic’s movements remaining fluid and natural, and avoiding distortion or disappearance seen in other workflows.
Conclusion
Based on the three examples provided above, it's clear that using Motion Brush with Kling 1.0 offers the best control over image elements, outperforming other options in Control-Video Alignment, Motion Effects, and Temporal Consistency. However, Kling 1.5 still holds a slight advantage in video quality. But this isn't always the case, as the first example shows, the difference in output quality can sometimes be minimal.
We are excited to see how Kling's Motion Brush tool will evolve in the future. Even in its initial version, this tool provides powerful, precise control over image elements for image-to-video AI generation. We can't wait to see how it will turn out once the motion brush tool is added to Kling 1.5!
We hope that you found our comparison useful!
And if you are interested, check out our collection of generative AI APIs from PiAPI!
