

How to Use an Image Background Remover API
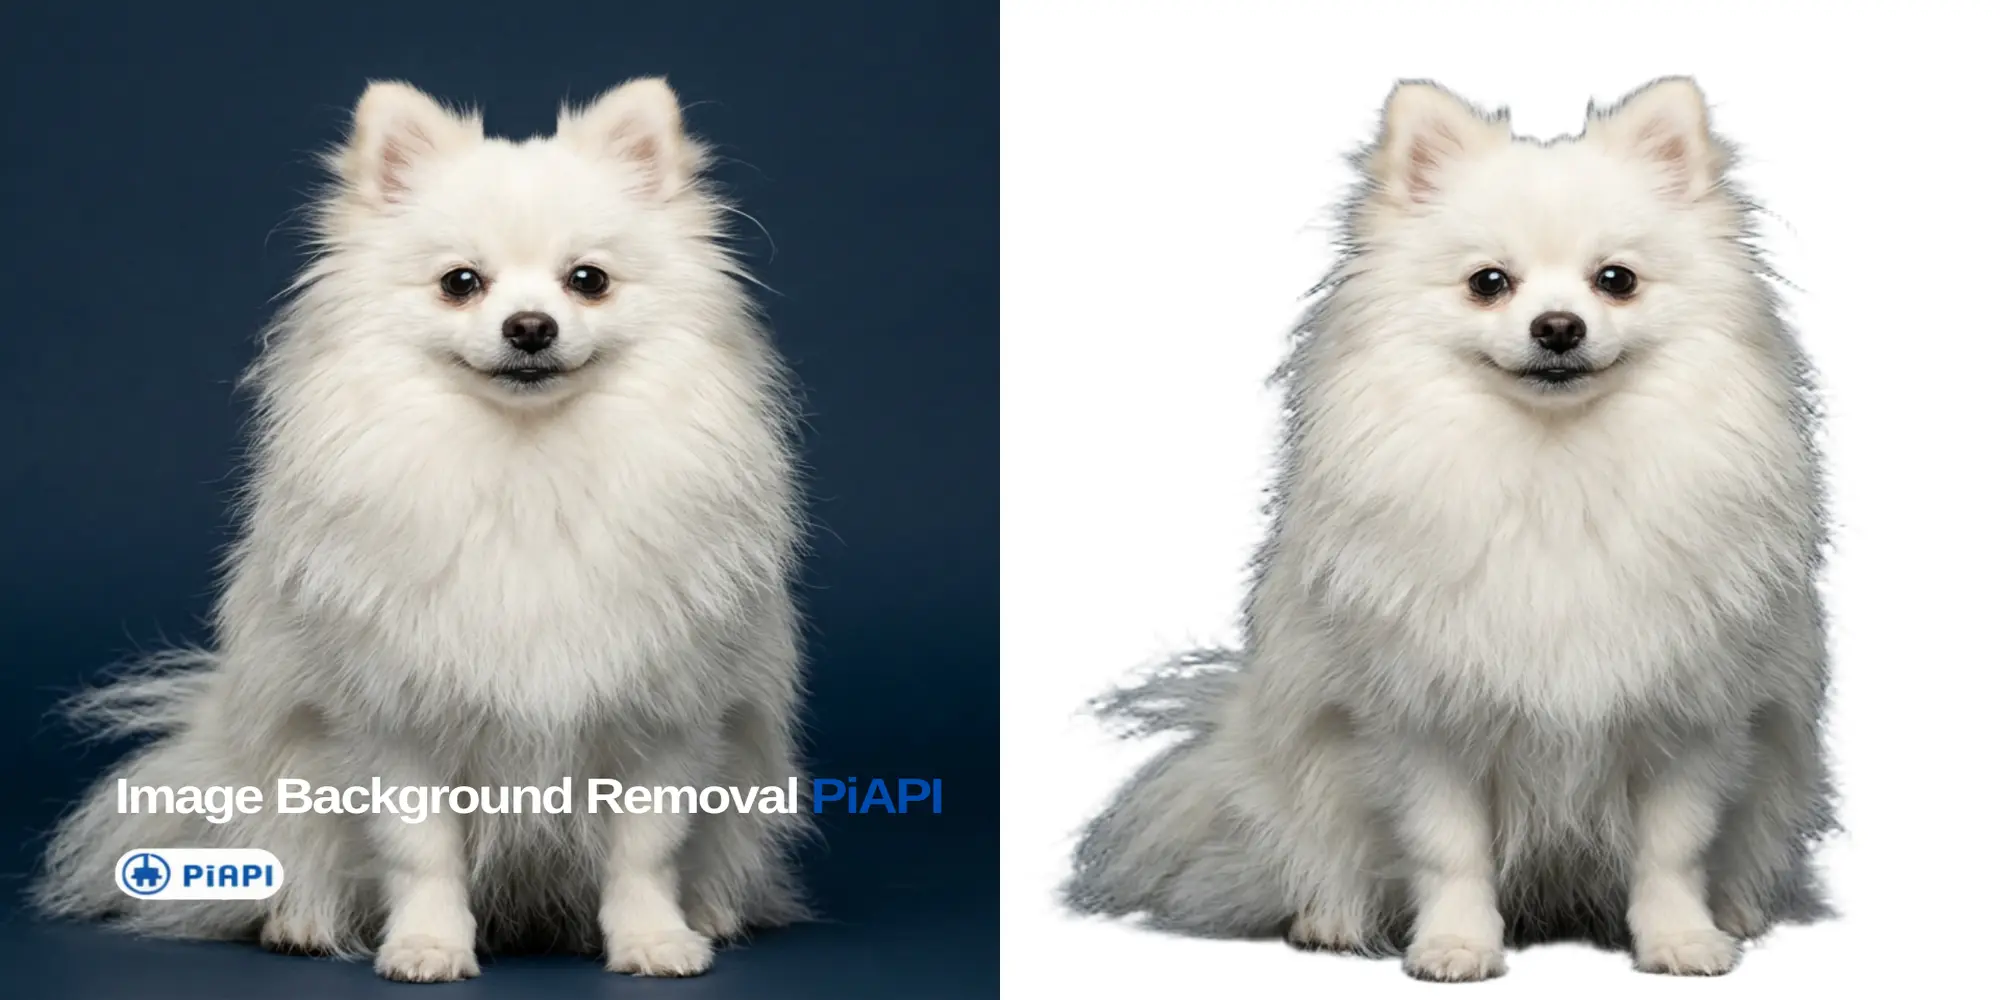
An image background remover API accepts an image and returns its foreground subject as a reusable cutout. PiAPI's Image Background Remover provides this through an asynchronous image-editing workflow: create a task, save its ID, poll for completion, and download the result.
This guide covers the workflow with cURL and JavaScript. It also examines three before-and-after examples—a ceramic mug, fine white fur, and transparent glass—to show what the API response alone cannot tell you about edge quality.
Definition
An image background remover API accepts an image, detects its foreground subject, removes the surrounding background, and returns a reusable cutout. With PiAPI, you create a background-removal task, poll its task ID, and retrieve the completed image URL.
Quick answer
To use PiAPI's image background remover API:
- Get a PiAPI API key and choose a safe test image with a public URL.
- Create a background-remove task with a removal model.
- Save the task_id returned by the API.
- Poll GET /api/v1/task/{task_id} until the task completes or your application reaches its own timeout.
- Download output.image_url, then inspect the cutout on light and dark backgrounds.
Key takeaways
- PiAPI uses an asynchronous create-task and get-task workflow.
- The product currently lists RMBG-1.4, RMBG-2.0, and BEN2.
- Check outputs on both light and dark destination backgrounds.
- Download completed results instead of assuming the returned URL is permanent.
In this guide
- What the API does
- What you need
- API workflow
- JavaScript example
- Model testing
- Three real examples
- Quality checklist
- Repeat processing
- Playground vs API
- Pricing and limitations
- FAQ
What is an image background remover API?
An image background removal API separates a foreground subject from its surrounding scene and returns an image that can be placed in a new composition. A common result is a PNG with alpha transparency: pixels outside the subject can be fully or partially transparent instead of being filled with white.
Background removal keeps the foreground and removes the scene around it. Object removal erases a selected element, while generative replacement creates new visual content. The PiAPI endpoint covered here produces a foreground cutout through the documented background-remove task type.
The output still needs visual review. A mask can retain the main object while leaving color spill around hair, losing translucent areas, or carrying part of the old background through clear glass.
What you need before starting
- a PiAPI account and a PiAPI API key;
- a test image available through a publicly reachable URL;
- cURL for the first request;
- Node.js 18 or later for the JavaScript example;
- a location where completed images can be saved.
The current create-task API reference demonstrates a URL in input.image. Do not assume that this field accepts a local filesystem path. Upload local sources to an accessible location before submitting the task.
Security
Keep the PiAPI API key on the server or in an environment variable. Never place a real API key in browser code, a public repository, an article, or a screenshot. For bash or zsh, set the key with:
export PIAPI_API_KEY="replace-with-your-key"In PowerShell, use:
$env:PIAPI_API_KEY = "replace-with-your-key"How to use the PiAPI image background remover API
Step 1: Test the image and choose a model
PiAPI's current product page lists RMBG-1.4, RMBG-2.0, and BEN2. For a new image category, compare the same representative source across the available models and inspect it on the backgrounds used by your product.
Use the embedded playground before writing the API request. Check interior gaps, fine edges, and transparent areas, then keep the same source image and selected model for the code walkthrough.
For task history and the full product experience, use the full PiAPI Image Background Remover .
Step 2: Create a background-removal task
Send a POST request to https://api.piapi.ai/api/v1/task with:
- model: Qubico/image-toolkit task_type: background-remove input.rmbg_model: the selected removal model input.image: a publicly reachable image URL
This example uses RMBG-2.0 to demonstrate the request shape, not as a universal recommendation.
curl --request POST \
  --url "https://api.piapi.ai/api/v1/task" \
  --header "Content-Type: application/json" \
  --header "x-api-key: ${PIAPI_API_KEY}" \
  --data '{
    "model": "Qubico/image-toolkit",
    "task_type": "background-remove",
    "input": {
      "rmbg_model": "RMBG-2.0",
      "image": "https://example.com/images/product-photo.jpg"
    }
  }'
According to the current documentation, a successful create response contains a pending task and a data.task_id. Save that identifier; the image is not necessarily ready when the create request returns.
{
  "code": 200,
  "data": {
    "task_id": "YOUR_TASK_ID",
    "model": "Qubico/image-toolkit",
    "task_type": "background-remove",
    "status": "pending",
    "output": null
  },
  "message": "success"
}
Step 3: Poll the task ID
Use the returned ID with the endpoint described in the get-task API reference:
curl --request GET \
  --url "https://api.piapi.ai/api/v1/task/${TASK_ID}" \
  --header "x-api-key: ${PIAPI_API_KEY}"
Use bounded polling instead of an endless loop. The interval and attempt limit in this guide are application safeguards, not published PiAPI limits. Adjust them after checking the latest documentation and account constraints.
When the task completes, read data.output.image_url. Stop on an unsuccessful HTTP response, a task error, or your application's timeout, and log enough context to investigate without recording the API key.
Step 4: Download and save the result
Once output.image_url is available, download the file rather than treating the URL as permanent storage.
curl --fail --location \
  --url "${OUTPUT_IMAGE_URL}" \
  --output "product-photo-background-removed.png"
Check the download's HTTP status and content type before passing it to another system. The general PiAPI output-storage guide does not currently state a retention period specifically for this background-removal endpoint, so save any result your application needs to keep.
Complete JavaScript example
This Node.js example creates a task, polls with an application-defined limit, checks the completed response, and saves the output. It uses the built-in fetch available in Node.js 18 and later.
import { writeFile } from "node:fs/promises";

const API_BASE = "https://api.piapi.ai/api/v1";
const API_KEY = process.env.PIAPI_API_KEY;
const INPUT_IMAGE_URL = "https://example.com/images/product-photo.jpg";

const POLL_INTERVAL_MS = 2_000; // Application choice, not a published API limit
const MAX_POLL_ATTEMPTS = 60;   // Application choice, not a published API limit

if (!API_KEY) {
  throw new Error("Set PIAPI_API_KEY before running this script.");
}

async function piapiRequest(path, options = {}) {
  const response = await fetch(`${API_BASE}${path}`, {
    ...options,
    headers: {
      "x-api-key": API_KEY,
      ...(options.body ? { "Content-Type": "application/json" } : {}),
      ...options.headers,
    },
  });

  const body = await response.json().catch(() => null);

  if (!response.ok) {
    throw new Error(
      `PiAPI request failed (${response.status}): ${JSON.stringify(body)}`
    );
  }

  return body;
}

async function createBackgroundRemovalTask() {
  const response = await piapiRequest("/task", {
    method: "POST",
    body: JSON.stringify({
      model: "Qubico/image-toolkit",
      task_type: "background-remove",
      input: {
        rmbg_model: "RMBG-2.0",
        image: INPUT_IMAGE_URL,
      },
    }),
  });

  const taskId = response?.data?.task_id;
  if (!taskId) {
    throw new Error("Create response did not include data.task_id.");
  }

  return taskId;
}

const delay = (milliseconds) =>
  new Promise((resolve) => setTimeout(resolve, milliseconds));

async function waitForTask(taskId) {
  for (let attempt = 1; attempt <= MAX_POLL_ATTEMPTS; attempt += 1) {
    const response = await piapiRequest(`/task/${taskId}`);
    const task = response?.data;

    if (task?.status === "completed") {
      const imageUrl = task?.output?.image_url;
      if (!imageUrl) {
        throw new Error("Completed task did not include output.image_url.");
      }
      return imageUrl;
    }

    if (task?.status === "failed" || task?.error?.code) {
      throw new Error(`Background-removal task failed: ${JSON.stringify(task.error)}`);
    }

    await delay(POLL_INTERVAL_MS);
  }

  throw new Error("Task did not complete within the configured polling window.");
}

async function downloadImage(imageUrl, outputPath) {
  const response = await fetch(imageUrl);
  if (!response.ok) {
    throw new Error(`Output download failed (${response.status}).`);
  }

  const bytes = Buffer.from(await response.arrayBuffer());
  await writeFile(outputPath, bytes);
}

async function main() {
  const taskId = await createBackgroundRemovalTask();
  console.log(`Created task: ${taskId}`);

  const imageUrl = await waitForTask(taskId);
  await downloadImage(imageUrl, "background-removed.png");

  console.log("Saved background-removed.png");
}

main().catch((error) => {
  console.error(error.message);
  process.exitCode = 1;
});
For production use, add structured logs, cancellation, deliberate retry rules, and durable storage. Treat these as application policies rather than API guarantees.
How to test the available background-removal models
You can compare the available background-removal models RMBG-1.4, RMBG-2.0, and BEN2 in the PiAPI playground. There is no single winner for every image: correction needs can change with the subject and destination design.
- Select two or three images representative of your workload.
- Run the exact same files through each available model.
- Preserve the original output files without retouching them.
- Place every cutout over white, near-black, and the actual destination background.
- Compare subject retention, interior gaps, fine edges, color spill, and translucent areas.
- Record which model requires the least manual correction for that image category.
Do not infer speed or reliability from one run. Measure those factors separately under realistic workload conditions.
What our three background-removal examples showed
We tested three deliberately different subjects: a solid ceramic mug, a white dog with fine fur, and a transparent glass bottle. All three downloaded PNGs contained alpha transparency. We then placed each cutout over white and near-black backgrounds to make edge and transparency problems easier to see.
These are first-party qualitative workflow observations, not a cross-model benchmark. The specific removal model was not recorded, so the results should not be used to rank RMBG-1.4, RMBG-2.0, or BEN2.
Simple product: ceramic mug
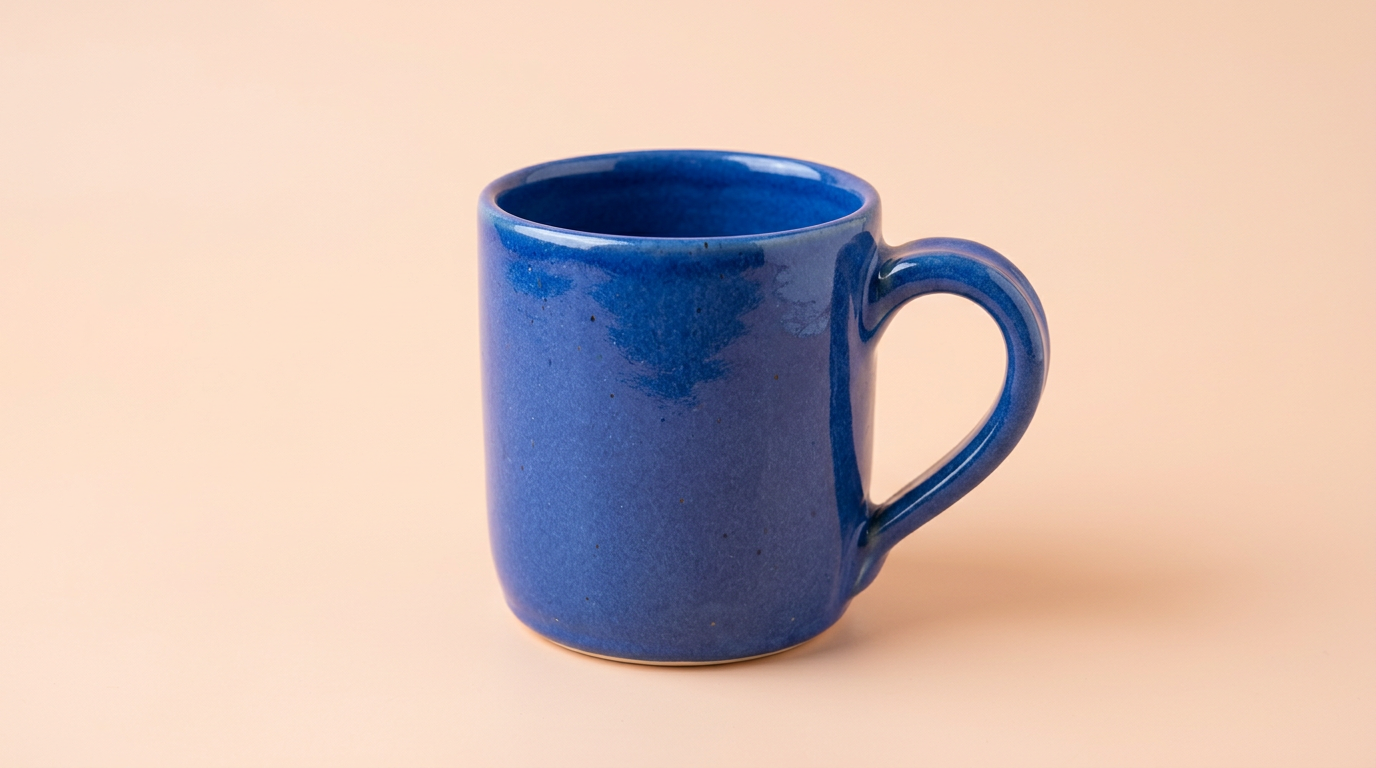
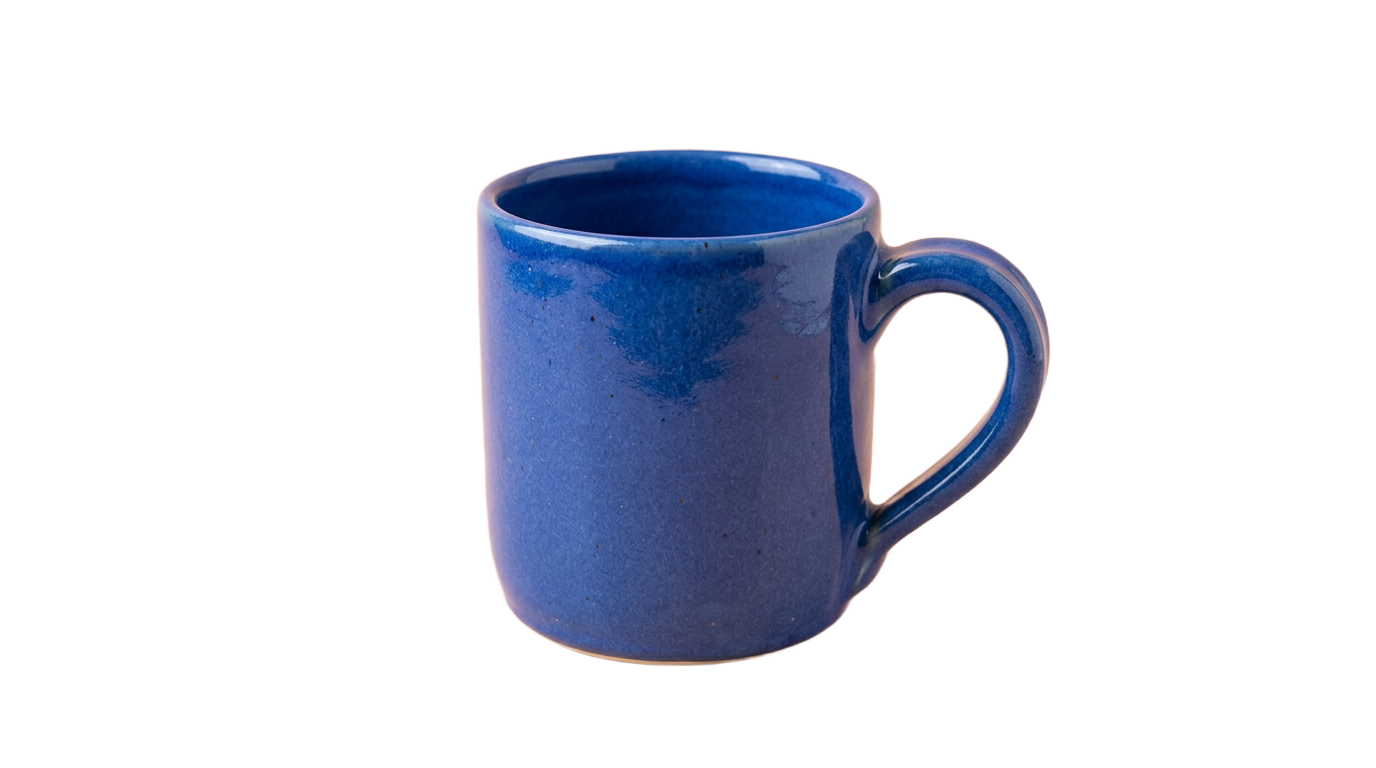
The mug was isolated cleanly, including the open space inside its handle. Its rim, glaze, handle, and base remained intact. A faint warm fringe became visible along parts of the edge over near-black, showing why even a straightforward product image should be checked against its destination color.
Fine edges: white fur


The output retained the dog's body, ears, paws, tail, and many wispy strands. It looked cohesive on near-black. On white, however, navy-gray contamination appeared around the ears, coat, and tail. Fine detail can survive while still carrying color from the original scene.
Difficult material: transparent glass
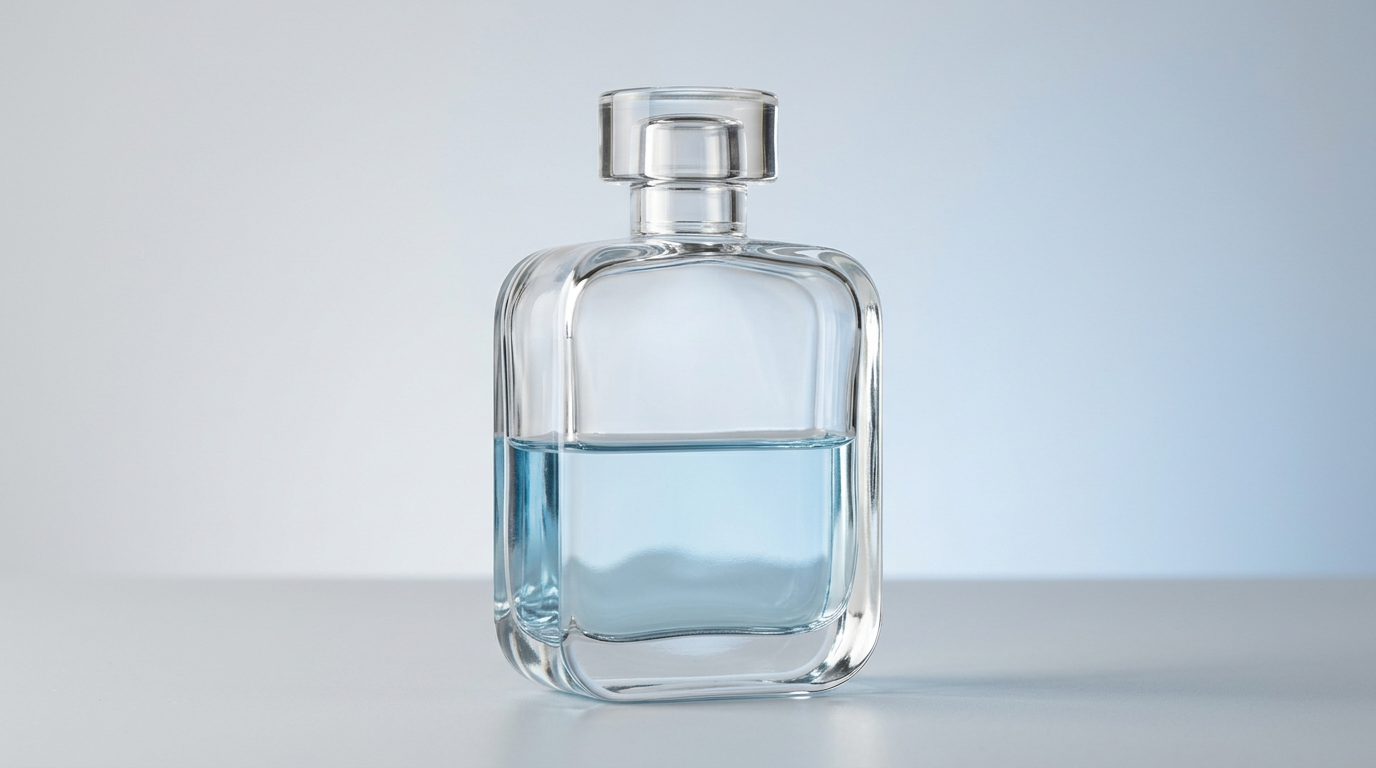
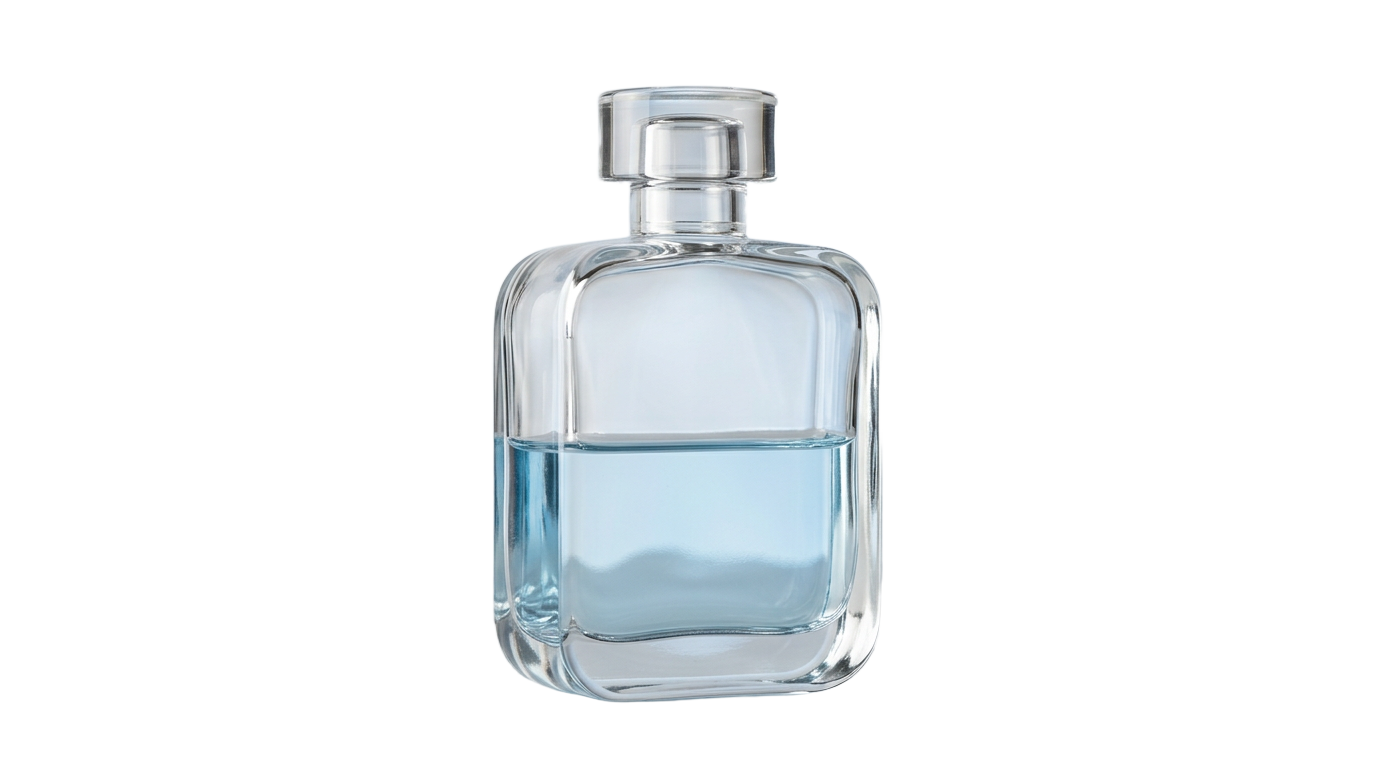
The bottle's outer boundary, cap, liquid line, reflections, and glass walls remained visible. It looked convincing on white, but near-black revealed pale residual color inside and around the translucent material. Transparent and reflective objects deserve compositing tests, not just a quick check of the outer silhouette.
How to check background-removal quality
Background-removal quality means retaining the intended subject while removing the old scene without halos, color spill, lost interior gaps, or broken translucent areas. A transparent file is therefore not automatically production-ready.
Pre-production QA checklist
- Open the original output and confirm that it contains alpha transparency.
- Place the cutout over white (#FFFFFF).
- Place the cutout over near-black (#111111).
- Test it on the actual destination background.
- Inspect hair, fur, thin edges, handles, straps, and interior gaps at 100% zoom.
- Look for light or dark halos and color inherited from the source background.
- Inspect glass, smoke, veils, reflections, and other partially transparent regions.
- Confirm that no part of the intended subject was cropped or erased.
- Review the image again at its real display size.
- Confirm that the saved format works in the next system in your pipeline.
White backgrounds expose dark or colored fringes. Dark backgrounds expose light halos and areas that became too opaque. Testing both catches problems that may remain invisible in a checkerboard preview.
How to handle repeat or automated processing
For repeat workloads, track each image as its own task. Store the source identifier, PiAPI task ID, status, attempt count, and final output location.
- take a queued source image;
- create one background-removal task;
- store its task ID;
- poll with bounded concurrency;
- log failed or timed-out work for review;
- download completed outputs into durable storage;
- run automated file checks before publishing.
Check the current PiAPI documentation before setting concurrency, rate-limit, webhook, or bulk-processing behavior. This guide does not assume a dedicated batch endpoint for background removal.
Playground vs API: Which workflow should you use?
Start with the playground for an unfamiliar image category. Move to the API after establishing an input policy, model choice, download process, and QA standard.
| Choose the playground when | Choose the API when |
|---|---|
| Testing one or a few images | Processing repeat workloads |
| Comparing available models manually | Integrating removal into an application |
| Reviewing edge quality interactively | Tracking task IDs programmatically |
| Validating a new source-image category | Building an automated media pipeline |
How much does PiAPI background removal cost, and what are its limitations?
PiAPI currently lists background removal at $0.001 per generation. Pricing can change, so verify the current per-image pricing before estimating a production workload.
- the documented JSON request uses a publicly reachable image URL;
- the product playground currently accepts JPEG, JPG, and PNG uploads, but that does not establish every API input limit;
- rate limits, file-size limits, and image-dimension limits are not specified on the create-task page reviewed for this guide;
- the output-storage page does not state a retention period specifically for this endpoint;
- glass, fur, reflections, and source-background color can still require inspection or cleanup.
Frequently asked questions
What is an image background remover API?
An image background remover API segments the foreground subject from its surroundings and returns a reusable cutout. It supports product catalogs, profile images, creative tools, and automated media workflows where manual masking would create a bottleneck.
How do I remove an image background through the PiAPI API?
Send a POST request to /api/v1/task with Qubico/image-toolkit, the background-remove task type, a removal model, and an image URL. Save the returned task ID, poll /api/v1/task/{task_id}, and download output.image_url after the task completes.
Which PiAPI background-removal model should I use?
Test RMBG-1.4, RMBG-2.0, and BEN2 with the same representative image, then inspect every result over light, dark, and real destination backgrounds. Choose from observed correction needs rather than assuming one model is universally best.
What does the PiAPI background-removal API return?
The create request returns task data that includes a task_id and an initial status such as pending. After the task completes, the get-task response exposes the result under data.output.image_url. Download that image if your application needs durable storage.
How can I get cleaner hair or fur edges?
Start with a sharp, adequately sized image and clear subject separation. Compare available models using the same source, then inspect the cutout on both light and dark backgrounds. If source-background color remains in fine strands, use a more suitable source or add edge-decontamination review before publishing.
Can I process multiple product images?
Yes. Create and track repeated tasks in your own queue, use bounded concurrency, store every task ID, log failures, and download completed outputs. Confirm current PiAPI account limits and bulk-service documentation before choosing throughput or retry settings.
Should I store the returned output image?
Yes, if the result is needed beyond the immediate task workflow. The current general output-storage documentation does not list a retention period specifically for background removal. Download the file, verify it, and store it in a location whose retention and access controls match your application.
When should I use the playground instead of the API?
Use the playground to test individual images, compare models, and review edge quality manually. Use the API when the input policy and quality standard are established and you need task tracking, application integration, repeat processing, or automated downloads.
Start with one representative image
Reliable background removal depends on both task handling and visual QA. Preserve the task ID, use bounded polling, save the completed result, and test the cutout against its real destination backgrounds. A solid product may need only a quick edge check, while fur and glass can expose color spill or transparency problems.
To put this image background remover API workflow into practice, test a representative image with PiAPI, compare the available models, and inspect the downloaded PNG on light and dark backgrounds before automating it.